
This article is an extension of a previous twitter thread. Here are some recommendations to improve your CodeNewbie articles:
- Add a cover image
- Format the text
- Add more than just text
- Add
altattributes to images - Do not add code as images
- Identify your code language
- A demo is worth 1,000 lines of code
- Be consistent with the topic
- Link sources
- Use language correction tools
- Extra: Add monetization to your profile
Add a cover image
Images are the language of social media: they capture ideas in little space, but more importantly, they draw attention. And (unfortunately), now more than ever, drawing attention is as important as the content itself.
When someone shares our article on social media, it will be displayed along with the link and the cover image, and we don't want the default (and nice-but-kind-of-boring) auto-generated CodeNewbie image.
Not everyone has the artistic abilities or the Photoshop skills to create a catchy cover image, but some sites can help you with that:
For example, the cover image from this article was shared by Glenn Carstens-Peters on Unsplash.
Also, take into account that only articles with cover images are showcased on CodeNewbie front page! This doesn't mean that CodeNewbie will showcase our article just by having a cover image, but at least it will have the chance of being there at a more visible spot. And more visibility can translate into more readers.
Format the text
Avoid the "dreaded wall of text." Don't just have a big chunk of text that scares readers away (I know it would scare me). Instead, format your text to make it easier to read: break your content into paragraphs, group it in sections with headings, add lists to organize elements, use bold fonts to highlight important concepts... It will make the text easier to read and keep the readers engaged and paying more attention. Do you want a practical example? See this paragraph and compare it to the content below. It is the same text but formatted differently. Which one is easier to read and follow?
Avoid the "dreaded wall of text." Don't just have a big chunk of text that scares readers away (I know it would scare me).
Instead, format your text to make it easier to read:
- break your content into paragraphs,
- group it in sections with headings,
- add lists to organize elements,
- use bold fonts to highlight important concepts...
It will make the text easier to read and keep the readers engaged and paying more attention. Do you want a practical example? See these paragraphs and compare them to the first paragraph of this section. It is the same text but formatted differently. Which one was easier to read and follow?
Add more than just text
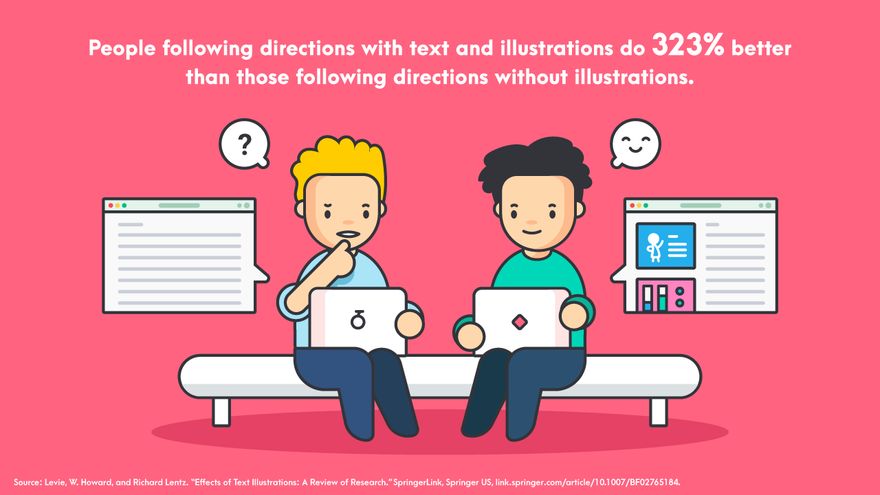
Humans are visual creatures, we may read, but what really will catch our attention is images: charts, graphs, photos...
When relevant, those images will serve two purposes: spice up the article (catching attention and engaging users) and supporting the text (emphasizing the content.)
Add alt attributes to images
Think accessible! Use forem's alt functionality to add alternative text and descriptions to your images. This may not be too relevant for sighted users, but screen reader users will really appreciate it.
When uploading an image, don't forget to add a proper alternative text. Here is how the code looks:

The path to the image goes between the parenthesis, and in brackets, we can see the alternative text.
Do not add code as images
This is related to accessibility too, but it affects everyone (because accessibility affects everyone).
Adding code as an image may seem like a great idea: it is properly formatted, and it looks nicer... but that's where all the advantages end and the cons outweigh the pros:
- Readers cannot copy the code to test it themselves
- Users of phones and small screens will have trouble reading the code in an image.
- They need to have a proper alternative text (see the previous point)
- Some firewalls may block the images.
Instead, we can add blocks of code by using the back-ticks this way:
```
code
```
Set the code language
"Now I can add code as text, but it looks ugly and colorless! So it's not worth it!" Patience, young grasshopper!
We have added and formatted the code as text... but it looks dull and difficult to read as all is white. To add more color and styles, you can specify the language next to the backticks like this:
```javascript
code in js
```
or
```html
<html code>
```
CodeNewbie will then format your code and add colors according to the language's grammar and syntax, making it easier to read. Here is an example:
// this is some JavaScript code
let x = 0;
window.alert(`${x} is a number`);
A demo is worth 1,000 lines of code
We have code, and it looks amazing now. But what's better than seeing static code? Seeing it running! CodeNewbie allows code snippets from sites like CodePen or JSFiddle in the articles. Please take advantage of it!
And it is not limited to front-end development. There are many options and platforms to use:
/* CodePen */
{% codepen url-to-your-codepen-demo %}

/* CodeSandbox */
{% codesandbox id-of-sandbox %}

/* DotNetFiddle */
{% dotnetfiddle url-to-your-dotnetfiddle-demo %}

/* JSFiddle */
{% jsfiddle url-to-your-jsfiddle-demo %}

/* Kotlin */
{% kotlin url-to-your-kotlin-demo %}

/* StackBlitz */
{% stackblitz id-of-demo %}

/* ...and many more... */
Also, these liquid tags go beyond demos and code. You can add nice links to other sites like GitHub, Twitter, Youtube, or even DEV. You can see a full list of liquid tags on the right side when editing your posts.
Be consistent with the topic
Talk the talk, and walk the walk. The "do what I say, not what I do" experience takes credibility away from the content. We need to be consistent and reliable:
- When writing about good practices, we should follow good practices.
- When writing about security, we should share secure and safe code.
- When writing about accessibility, our code should be accessible. (And the post images should definitely have alt text!)
- etc.
Failing at this is something that will put your readers off, and that could make them question the trustworthiness of what they are reading.
Link sources
Offer resources for readers to dig deeper into the topic. They'll support your content, add credibility to your article, and spice up the article (links normally are underlined and with different colors, breaking the monotony of the text.)
And please, please, please, please: every time you use someone else's text/code, cite your sources! Failing to do so could be considered plagiarism. Furthermore, it goes against CodeNewbie/forem terms of use... and the law in many countries!

Use language correction tools
Ideally, it would be nice to have a person review our articles before we hit the publish button. But that's not always possible. Some browsers will highlight unknown words on the CodeNewbie editor, which is nice but not enough.
There are tools online that will help you with your grammar and syntax: Grammarly, ProWritingAid, Ginger, Reverso, Hemingway App... I use Grammarly.
These extensions may not be perfect, but they are definitely helpful... especially for people whose first language is not English but (try to) write in English. And they will be helpful for native-English-speakers too.
Extra: Add monetization to your profile
This is more of an advantage for you than for your readers, but still, a nice option CodeNewbie/forem offers: make some money with what you write.
Activate web monetization by adding a payment pointer in the following path in the settings:
Settings > Extensions > Web monetization
Web monetization works by adding a meta tag with a link to your payment pointer. It does not affect how readers see your posts, and it won't impact the speed/performance of the site.
You probably won't be making enough money to retire, but better than nothing.


Latest comments (1)
Thanks Alvaro