How I Learned to Build Beautiful Anime Cards (Thanks to AI + Curiosity)
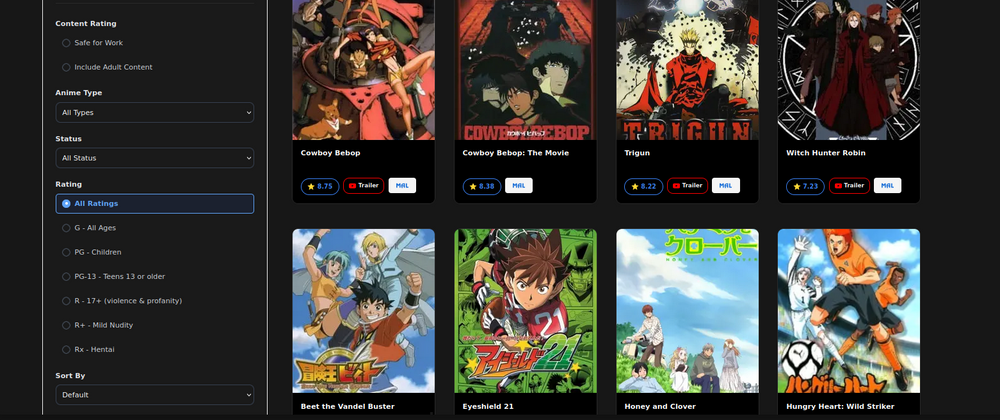
When I was building my Next.js anime browser, I wanted each anime to feel special—not just a static image, but a little interactive card that reveals more when you hover over it.
I didn’t know how to do it… so I asked Cursor AI to help me generate a cool styling. And you know what? I was amazed and also That’s where the real learning began.
Instead of just copying the code, I studied it, broke it, fixed it, and made it my own. Here’s what I learned along the way.
1. Responsive Grid: “Fit as Many Cards as Possible”
First, I needed the cards to look great on any screen—phone, tablet, or desktop.
The AI suggested this CSS trick:
.animeGrid {
  display: grid;
  grid-template-columns: repeat(auto-fill, minmax(280px, 1fr));
  gap: 24px;
}
At first, I didn’t get it. But after playing with it, I realized:
-
minmax(280px, 1fr)= “Each card is at least 280px wide, but can grow to fill space.” -
auto-fill= “Add as many columns as fit—no media queries needed!”
It’s pure CSS magic—and now I use it everywhere(though i remember it!)
2. The Hover Overlay: Sleek, Smooth, and Useful
I wanted to show more details (score, summary, genres) on hover—without cluttering the main view.
Here’s the core idea the AI gave me:
- Wrap the card in a
position: relativecontainer - Add an absolutely positioned
.animeOverlaythat’s hidden by default - On hover, slide it in with
transformand fade it withopacity
.animeCard {
  position: relative;
  overflow: hidden;
}

.animeOverlay {
  position: absolute;
  top: 0; left: 0; right: 0; bottom: 0;
  background: linear-gradient(
    to bottom,
    rgba(0,0,0,0.8) 0%,
    rgba(0,0,0,0.3) 100%
  );
  backdrop-filter: blur(2px);
  opacity: 0;
  transform: translateY(-100%);
  transition: all 0.4s cubic-bezier(0.4, 0, 0.2, 1);
  padding: 16px;
  z-index: 10;
}

.animeCard:hover .animeOverlay {
  opacity: 1;
  transform: translateY(0);
}
What I learned:
-
backdrop-filter: blur()creates that modern glass effect -
cubic-bezier(0.4, 0, 0.2, 1)is the same easing Apple uses—it feels natural - Always use
overflow: hiddenon the parent to prevent scrollbars during animation
3. Custom Scrollbar: Because Default Ones Are Ugly
Some anime have long synopses, so the overlay needs to scroll. But browser scrollbars are thick and distracting.
The AI showed me how to style a minimal, elegant scrollbar:
.overlayContent {
  overflow-y: auto;
  /* Firefox */
  scrollbar-width: thin;
  scrollbar-color: rgba(255,255,255,0.3) transparent;
}

/* WebKit (Chrome, Safari) */
.overlayContent::-webkit-scrollbar {
  width: 4px;
}
.overlayContent::-webkit-scrollbar-thumb {
  background: rgba(255,255,255,0.3);
  border-radius: 2px;
}
Now the scrollbar is:
- Only 4px wide
- Semi-transparent white
- Rounded corners
- Invisible until you scroll
It feels native, clean, and intentional—like it belongs.
The Real Lesson: AI Is a Teacher, Not a Crutch
I could’ve just pasted the code and moved on. But by asking “why?”—
- Why
minmax()? - Why
transforminstead oftop? - Why
backdrop-filter?
—I turned AI output into real understanding.
And that’s the key: use AI to jumpstart your learning, not replace it.
Now I know some styling patterns that I didn't know before!
💡 Try it yourself:
Take an AI-generated snippet, save it somewhere else, and rebuild it from scratch. You’ll learn 10x more.
Happy coding—and happy styling! 🎨✨


Top comments (2)
Some comments may only be visible to logged-in visitors. Sign in to view all comments.