This post contains affiliate links. I may earn a small commission fee if you make a purchase through the links. Thanks.
In previous tutorials, we discussed how to deploy Laravel and Django applications on Linux servers, but we missed two very important topics.
- How to set up a server so that it is secure and safe to use.
- How to map your domain to your server so that it is accessible to the public.
We are going to tackle these problems in this article.
When we talk about a web server, we are usually referring to a virtual private server. A virtual private server (VPS), in layman's terms, is a computer that serves data and resources for your website. When your website is visited, that computer will transfer these resources to the client. As for the name "virtual", it means this computer also utilizes the virtualization technology to split one physical server into multiple virtual servers so that they would be more affordable to you.
Choose a VPS provider
There are many great companies that provide VPS services, such as Digital Ocean, Vultr, and Linode. Each of them offers different functionalities.
In this article, I'm going to use Vultr as an example. You can use this link to receive $100 to get you started. But, just in case you are using a different provider, I won't be using any of its extra functionalities. Let's stick to the basics and set up everything manually.
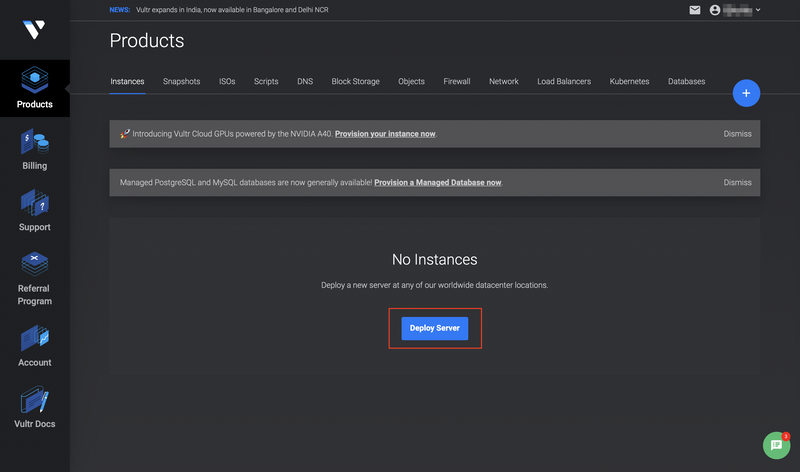
First, go to Products and click on Deploy Server:
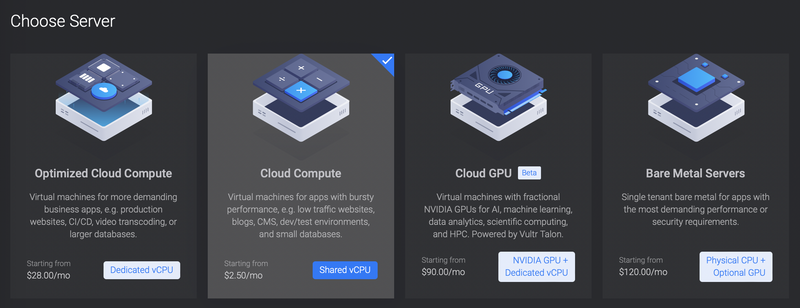
Next, choose what kind of server you want. I recommend always starting with the cheapest option if you don't know what to choose. You can always upgrade to better servers, but no VPS provider offers downgrade services because that would risk data loss.
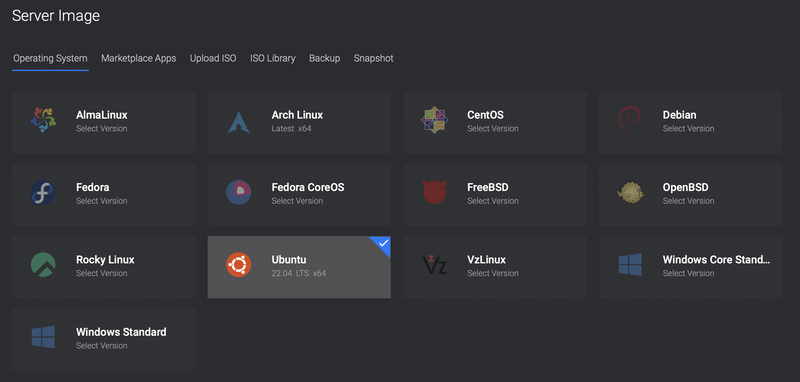
Next, choose your CPU, server location, and Operating system. Always choose a distribution you are familiar with. Here I'll use Ubuntu for demonstration purposes:
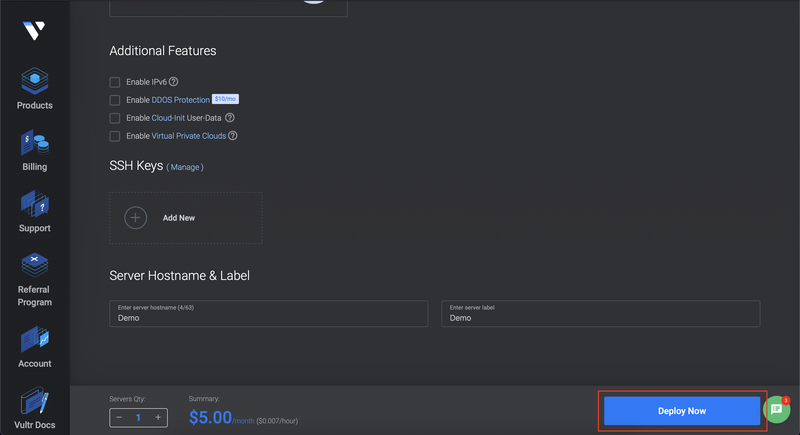
Choose your server size, again, you should start with the cheapest option. For the Additional Features, you can leave them unchecked if you don't know what they are. You can always add them later if you need them. Finally, give your server a hostname and click Deploy Now:
It would take a few minutes for the server to install. Once its status becomes Running, the server will be assigned an IP address, and a root user will be created:
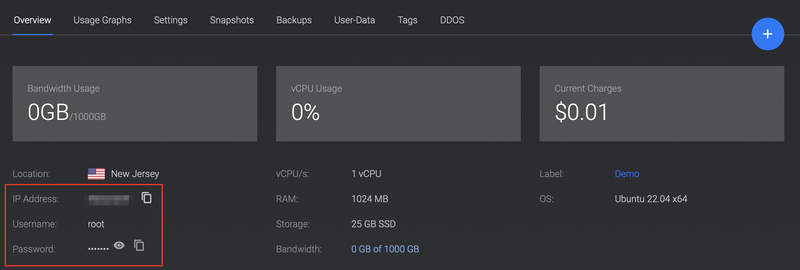
You can use the IP address to access the server. On your own computer, open the terminal and type in:
ssh root@<ip_address>
You will be prompted to type in the root user's password. The password will not be displayed as you type, that is just a security measure, not a bug.
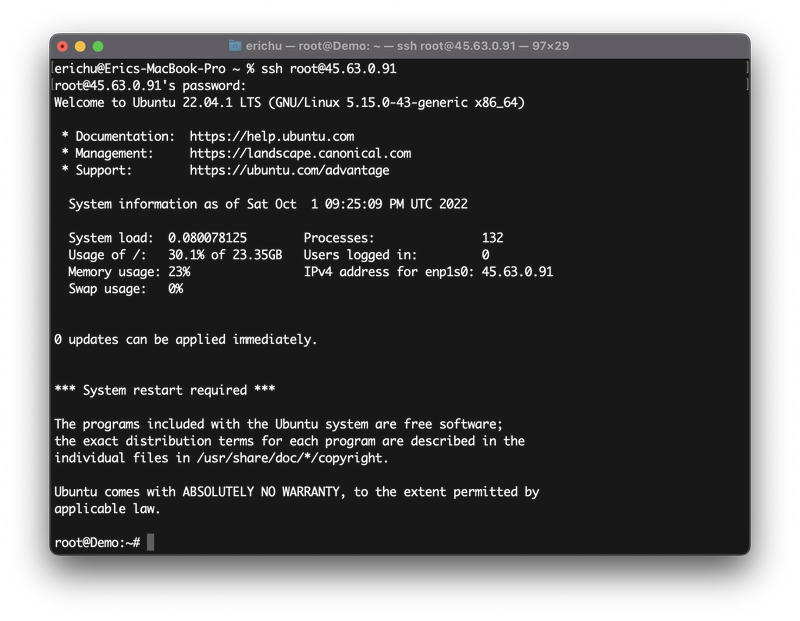
If you see the same output, that means you are ready to use your new server!
Prepare your server
Before you start deploying your projects, there are still some preparations you need to do, or your server will be vulnerable to attacks.
Create a new user
First of all, you shouldn't be using the root user. The root user has the power to do anything to your server, and no one should have that much power. You can create a new user (let's call him jack) account using the following command:
adduser jack
Create a new password for user jack, and type in his information:

Give this new user root privileges by adding him to the sudo group:
usermod -aG sudo jack
DO NOT close the terminal in case something goes wrong. Open up a new terminal window and sign in as the new user:
ssh jack@<ip_address>
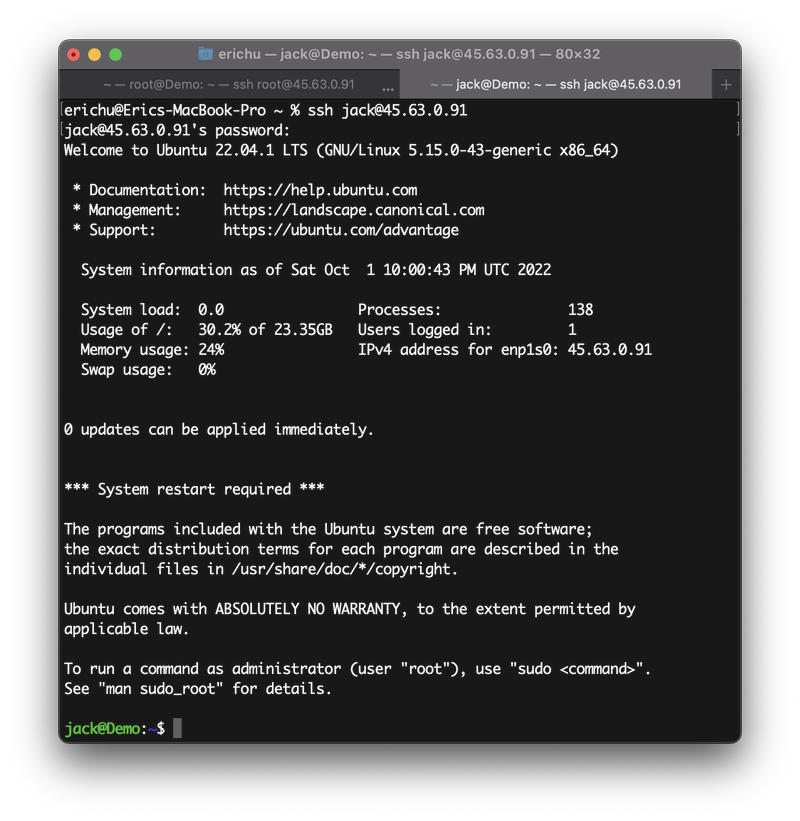
Make sure you can run commands as the administrator:
sudo <command>
You will be prompted to type in jack's password. If this works for you, then it is safe to close the root user's windows. From now on, we'll be working as the new user, jack.
Next, you need to make sure no one can sign in as the root user. The root sign-in can be disabled in the sshd_config file. Open up the file using the following command:
sudo nano /etc/ssh/sshd_config
Scroll down and find PermitRootLogin:
. . .
# Example of overriding settings on a per-user basis
#Match User anoncvs
#       X11Forwarding no
#       AllowTcpForwarding no
#       PermitTTY no
#       ForceCommand cvs server
PasswordAuthentication yes
PermitRootLogin yes
Change yes to no:
PermitRootLogin no
Press CTRL+X to exit the nano editor, and type Y to save the buffer:
Save modified buffer?
 Y Yes
 N No           ^C Cancel
Press ENTER to exit:
File Name to Write: /etc/ssh/sshd_config
^G Help             M-D DOS Format      M-A Append          M-B Backup File
^C Cancel           M-M Mac Format      M-P Prepend         ^T Browse
For this change to take effect, you need to restart the sshd daemon:
sudo systemctl restart sshd
Now you can try to sign in as the root user, and you will get a Permission denied message:

Sign in via SSH keys
And then there is the password. Passwords, no matter how complex, are still too easy to crack. You need to make sure the only way to sign in to your server is via Secure Shell Protocol (SSH) keys.
First, you need to create a key pair. There should be a public key, which is placed on your server, and a private key, which is held by you. If the key pair match, then you will be signed in.
Using your own computer, create the key pair with the following command:
ssh-keygen
This command will work on both Windows and macOS, but I recommend setting up WSL if you are using Windows. By default, it will create a 3072-bit RSA key pair. If you wish to make it more secure, you can add an optional -b flag like this:
ssh-keygen -b 4096
You should see the following output:
Generating public/private rsa key pair.
Enter file in which to save the key (/Users/<your_home>/.ssh/id_rsa):
By default, the private key will be generated under your home directory, in the .ssh folder. You can change its destination if you want to. I'll keep the default path and press ENTER:
Enter passphrase (empty for no passphrase):
You can create an optional passphrase for the key pair. This is an extra layer of security for your server, and it is highly recommended if the data on your server is very important.
After you are done, you should get the following output:
Your identification has been saved in /Users/<your_home>/.ssh/id_rsa
Your public key has been saved in /Users/<your_home>/.ssh/id_rsa.pub
The key fingerprint is:
SHA256:EiQgE7ZQB/2v40ccfrXxnQrFs383qS/DgQ1xK8pjQ4Q erichu@Erics-MacBook-Pro.local
The key's randomart image is:
+---[RSA 3072]----+
| =+++o . .      |
| o------------. |
| .   .. .   + . |
| .... oo=       |
| .+S...*+o..    |
| .=*.o.+...     |
| o..o o + .     |
| o .    = +o    |
| ..o     .=.+   |
+----[SHA256]-----+
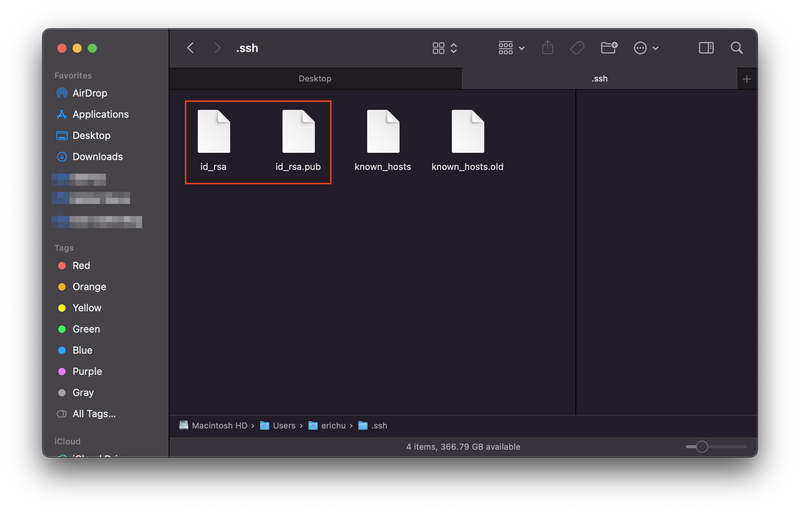
Open the .ssh directory, and you should see the generated key pair.
Next, you need to send the public key (id_rsa.pub) to your server. On your own computer, run the following command:
ssh-copy-id jack@<ip_address>
You should see the following output:
/usr/bin/ssh-copy-id: INFO: Source of key(s) to be installed: "/Users/erichu/.ssh/id_rsa.pub"
/usr/bin/ssh-copy-id: INFO: attempting to log in with the new key(s), to filter out any that are already installed
/usr/bin/ssh-copy-id: INFO: 1 key(s) remain to be installed -- if you are prompted now it is to install the new keys
After you've typed in jack's password:
Number of key(s) added:        1

Now try logging into the machine, with:   "ssh 'jack@45.63.0.91'"
and check to make sure that only the key(s) you wanted were added.
Unfortunately, this command utility is not available on Windows systems, so you can either set up WSL, or you can follow this tutorial from Digital Ocean, which offers an all-in-one command that copies the public key to your server:
cat ~/.ssh/id_rsa.pub | ssh username@remote_host "mkdir -p ~/.ssh && touch ~/.ssh/authorized_keys && chmod -R go=$$ ~/.ssh && cat >> ~/.ssh/authorized_keys"But as you can see, this command requires you to have a decent understanding of Linux systems.
Next, you can open up another terminal and try to sign in as jack. This time you will be prompted to type in the passphrase for your private key instead of jack's password. If you didn't set up a passphrase, you would be signed in directly.
Lastly, you need to disable the password sign-in so that every user must use an SSH key. Go to the same sshd_config file we discussed before:
sudo nano /etc/ssh/sshd_config
Locate PasswordAuthentication yes, and change it to no:
# Example of overriding settings on a per-user basis
#Match User anoncvs
#       X11Forwarding no
#       AllowTcpForwarding no
#       PermitTTY no
#       ForceCommand cvs server
PasswordAuthentication no
PermitRootLogin no
Remember to restart the sshd daemon:
sudo systemctl restart sshd
Deploy your project
Now your server should be secure and ready, and it's time to deploy your project. For a typical web application, you'll need at least a server application such as Apache or Nginx, and a database such as MySQL or PostgreSQL. These applications could be very difficult to install and configure, especially if you are a beginner. So, for this part, I recommend using a server control panel.
The most famous option would be CPanel, but unfortunately, it's going to cost you $15.99 per month. That's very costly for a personal project, so if you are looking for a free alternative, I found this aaPanel that does most of the job for me.
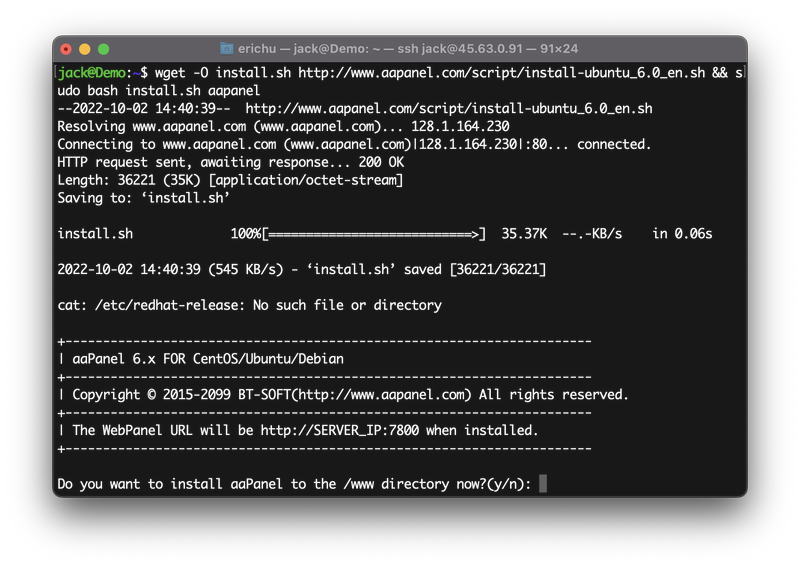
The panel can be easily installed using the following command:
wget -O install.sh http://www.aapanel.com/script/install-ubuntu_6.0_en.sh && sudo bash install.sh aapanel
You will be asked to confirm this installation:
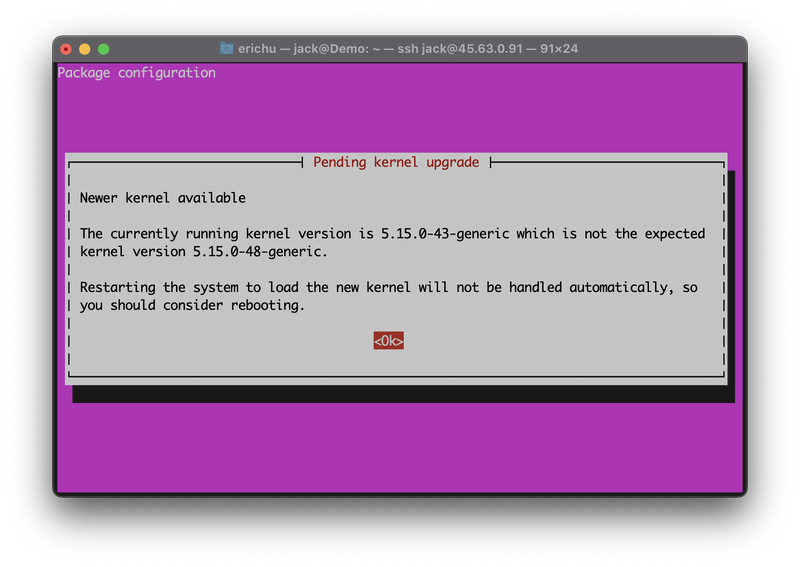
You might also be prompted to upgrade your kernel. If that's the case, just press ENTER:
After the Bash script finished running (it is normal for this process to take 10 to 20 minutes, please be patient here), you should see this output telling you how to access your panel:
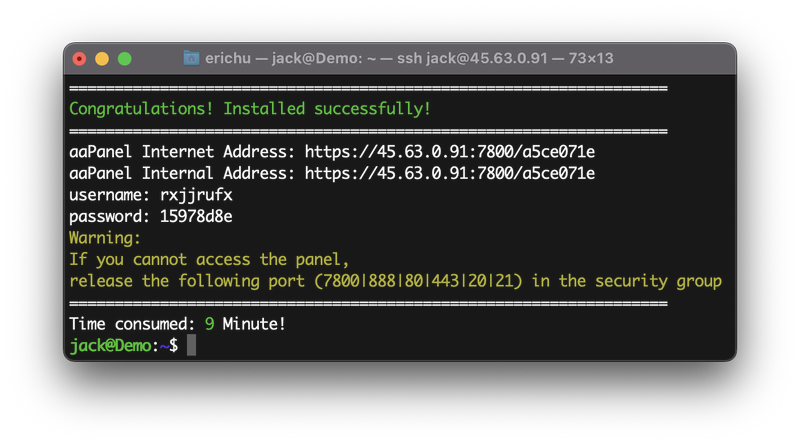
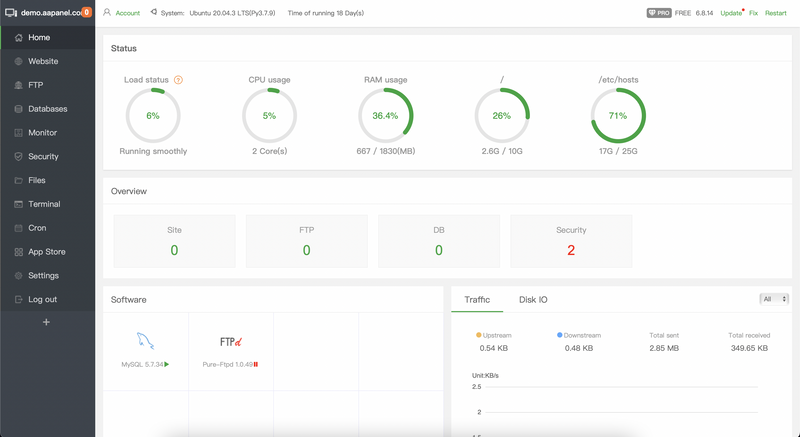
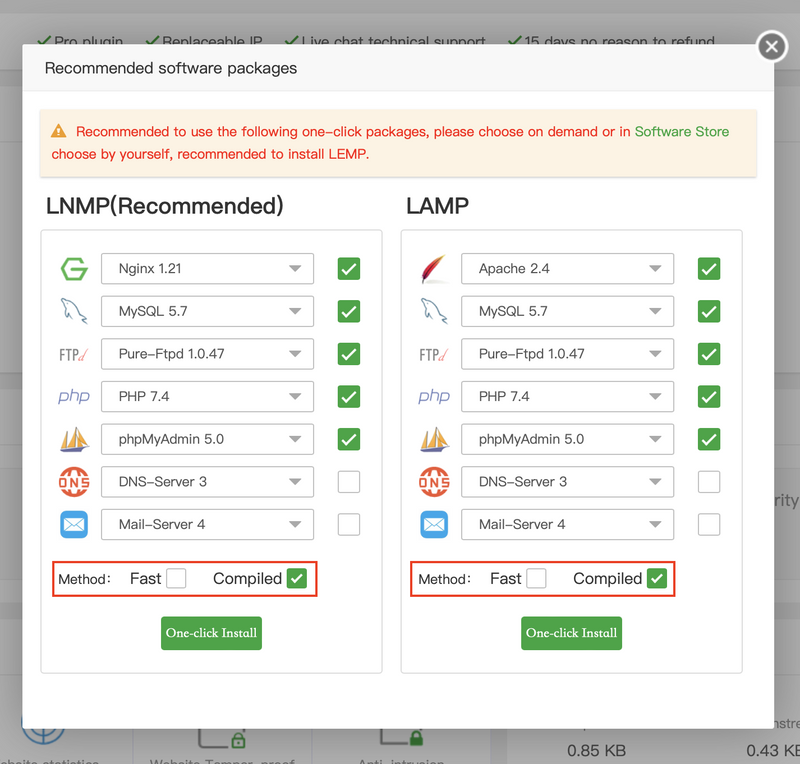
Follow the instruction and log into your panel, and install whatever software you might need for your project. Remember to use compile mode if you are setting up a production environment:
After the installation process is finished, head over to the Website tab and create a new website, as we discussed in the respective Laravel or Django tutorials.
Choose a domain
Now let's talk about what happens after you've deployed your project. Right now, your project should be accessible by visiting the server's IP address directly, but this is not ideal. For the website to be accessible to the public, you need to give it a domain.
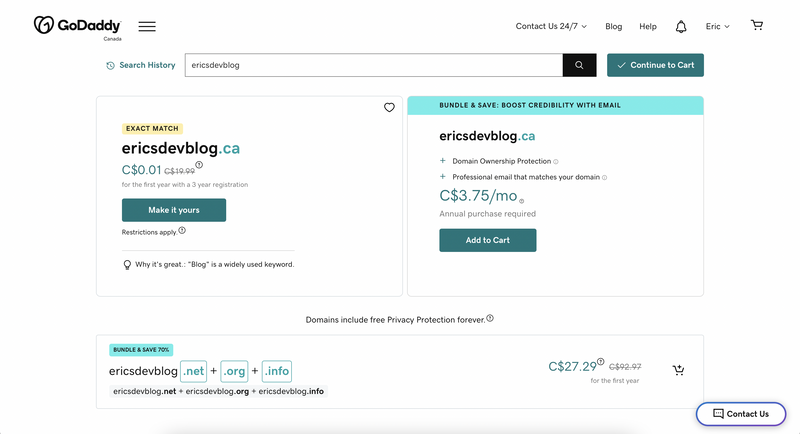
There are many domain registers for you to choose from, and in this article, let's use GoDaddy as an example. Register an account on their website and search for a domain name:
After you've purchased a domain, you should see it under My Products.
Scroll down to the All Products and Services section, find your domain name and click the DNS button:

A DNS server is like a phone book of the internet, it maps domain names to IP addresses. When you visit a domain in your browser, you are actually visiting a DNS server first, that DNS server will find the corresponding IP address and route you there.
So what you need to do here is to register your domain with a DNS server by creating DNS records. There are many different types of DNS records, but for now, we only care about A record and CNAME records. The A record is the primary record, and it should point to your server's IP address. The CNAME records, on the other hand, are alias records. They create aliases (www.example.com, me.example.com, blog.example.com...) that could point to an existing A record, or a different server. For example:
| Type | Host | Points to | TTL |
|---|---|---|---|
| A | @ | server_ip_address | 1 hour |
| CNAME | www | @ | 1 hour |
| CNAME | gallery | different_ip_address | 1 hour |
For your first A record, its host should be @, which refers to your first-level domain (example.com), and it should point to your server. TTL determines how long the DNS server would cache this record. The record will be refreshed automatically after it expires.
The first CNAME creates an alias (www.example.com), which points to the A record we just defined. The second CNAME creates another alias (gallery.example.com), which points to a different server where you can host your gallery app.
Save the changes and wait for the DNS server to update. This process could take up to 48 hours to complete, so please be patient. After that, you should be able to access your app by visiting your domain.
If you liked this article, please also check out my other tutorials:


Top comments (0)