Django + HTMX Chat application
Introduction
In this article, we will be creating a Django project, which will be a chat-room kind of application. The user needs to authenticate to the app and then and there he/she can create or join rooms, every room will have some name and URL associated with it. So, the user simply needs to enter the name of the room, which will be unique. The user can then simply enter the messages in the chat room. This is a core chat application that uses web sockets.
The unique thing about this app will be that, we don't have to write a javascript client. It will all be handled by some HTMX magic. The web socket in the backend will definitely handle using Django channels.
Demo:
Requirements:
Django
Django-channels
daphne
HTMX
SQLite or any relational database
Also if we want to use the application on a large and production scale:
Redis
channels_redis
The code for this chat app is provided in the GitHub repository.
Setup for Django project
We will create a simple Django project to start with. The project can have two apps, one for auth and the other for the chat. You can customize the way you want your existing project accordingly. This project is just a demonstration of the use of the chat application with websockets and Django channels.
I'll call the project backchat, you can call it whatever you want. We will create a virtual environment and install Django in that virtual environment
virtualenv .venv

For Linux/macOS:
source .venv/bin/activate

For Windows:
.venv\scripts\activate

pip install django
django-admin startproject backchat
cd backchat
This will set up a base Django project. We can now work on the actual implementation of the Django project. Firstly, we will start with authentication.
Adding basic Authentication and Authorization
Creating the accounts app
We can separate the authentication of the user from the rest of the project, by creating a separate app called user or accounts app.
python manage.py startapp accounts
Creating a base user model
We'll start by inheriting the AbstractUser the model provided in the django.contrib.auth.models module. The model has base fields like username and password which are required fields, and email, first_name, last_name, etc. which are not mandatory. It is better to create a custom model by inheriting the AbstractUser because if in the longer run, we need to make custom fields in the user model, it becomes a breeze.
# accounts/models.py


from djnago.contrib.auth.models import AbstractUser


class User(AbstractUser):
    pass
This creates a basic custom user rather than using the Django built-in user. Next, we need to make sure, Django understands the default user is the one we defined in the accounts app and not the default User. So, we just need to add a field called AUTH_USER_MODEL in the settings.py file. The value of this field will be the app name or the module name and the model in that python module that we need our custom user model to be set as the default user model.
# backchat/settings.py


INSALLED_APPS = [
    ...
    ...
    "accounts",
]

# Append to the end of file
AUTH_USER_MODEL = 'accounts.User'
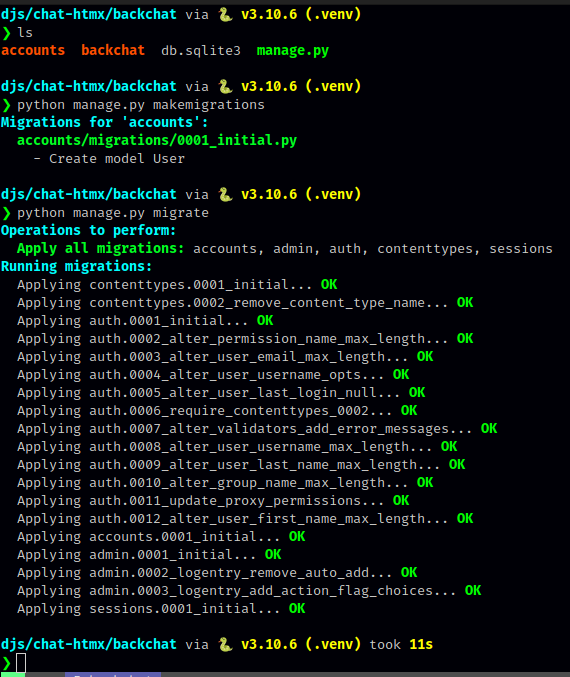
Initial migrations for the Django project
Now, this will get picked up as the default user model while referring to any processing related to the user. We can move into migrating the changes for the basic Django project and the user model.
python manage.py makemigrations
python manage.py migrate
Creating register view
Further, we can add the views like register and profile for the accounts app that can be used for the basic authentication. The Login and Logout views are provided in the django.contrib.auth.views module, we only have to write our own register view. I will be using function-based views to keep it simple to understand but it can simply be a class-based view as well.
To define a view first, we need to have form, a user registration form. The form will inherit from the UserCreationForm form which will make the bulk of the task for us at the user registration. We can simply then override the Meta class with the fields that we want to display, so hence we just keep the username and the password fields. The form can be customized by adding in the widget attribute and specifying the classes used in them.
# accounts/forms.py


from accounts.models import User
from django.contrib.auth.forms import UserCreationForm

class UserRegisterForm(UserCreationForm):

    class Meta:
        model= User
        fields = ['username', 'password1', 'password2']
This will give us the UserRegisterForm form that can be used for displaying in the register view that we will create in the next step.
We will have to create the register view that will render the form for user registration and will also process the form submission.
# accounts/views.py


from django.contrib import messages
from django.shortcuts import redirect, render
from accounts.forms import UserRegisterForm

def register(request):
    if request.method == "POST":
        form = UserRegisterForm(request.POST)
        if form.is_valid():
            form.save()
            username = form.cleaned_data.get("username")
            messages.success(
                request, f"Your account has been created! You are now able to log in"
            )
            return redirect("login")
    else:
        form = UserRegisterForm()
        return render(request, "accounts/register.html", {"form": form})
The above register view has two cases, one for the user requesting the registration form and the second request when the user submits the form. So, when the user makes a get request, we load an empty form UserRegisterForm and render the register template with the form. We will make the templates later.
So, the template is just rendered when the user wants to register and when the user submits the form(sends a post request) we get the details from the post request and make it an instance of UserRegisterForm and save the form if it is valid. We then redirect the user to the login view (will use the default one in the next section). We parse the message as the indication that the user was created.
Adding URLs for Authentication and Authorization
Once, we have the register view setup, we can also add login and logout views in the app. But, we don't have to write it ourselves, we can override them if needed, but we'll keep the default ones. We will use the LoginView and the LogoutView view which are class-based views provided in the django.contrib.auth.views module. We will provide the respective templates for each of these views.
# accounts/urls.py


from django.urls import path
from django.contrib.auth import views as auth_views
import user.views as user_views

urlpatterns = [
    path("register/", user_views.register, name="register"),
    path(
        "login/",
        auth_views.LoginView.as_view(template_name="accounts/login.html"),
        name="login",
    ),
    path(
        "logout/",
        auth_views.LogoutView.as_view(template_name="accounts/logout.html"),
        name="logout",
    ),
]
We have named the URLs as register, login, and logout so that we can use them while rendering the links for them in the templates. Now, we also need to include the URLs from the accounts app in the project URLs. We can do that by using the include method and specifying the app name with the module where the urlpatterns are located.
# backchat/urls.py


from django.contrib import admin
from django.urls import include, path

urlpatterns = [
    path("admin/", admin.site.urls),
    path("auth/", include("accounts.urls")),
]
So, we have routed the /auth path to include all the URLs in the accounts app. So, the login view will be at the URL /auth/login/ , and so on.
Also, we need to add the LOGIN_REDIRECT_URL and LOGIN_URL for specifying the url name which will be redirected once the user is logged in and the default login url name respectively.
# backchat / settings.py


LOGIN_REDIRECT_URL = "index"
LOGIN_URL = "login"
We are now almost done with the view and routing part of the accounts app and can move into the creation of templates.
Adding Templates for authentication views
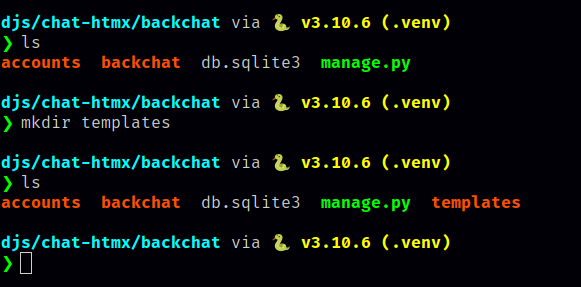
We need a few templates that we have been referencing in the views and the URLs of the accounts app in the project. So there are a couple of ways to use templates in a Django project. I prefer to have a single templates folder in the root of the project and have subfolders as the app which will have the templates specific to those apps.
I usually create a base.html file in the templates folder and use that for inheriting other templates. So, we will have to change one setting in the project to make sure it looks at templates/ from the root of the project.
# backchat/settings.py

import os

...
...

TEMPLATES = [
    {
        "BACKEND": "django.template.backends.django.DjangoTemplates",
        "DIRS": [ os.path.join(BASE_DIR, "templates"), ],
        "APP_DIRS": True,
        "OPTIONS": {
            "context_processors": [
                "django.template.context_processors.debug",
                "django.template.context_processors.request",
                "django.contrib.auth.context_processors.auth",
                "django.contrib.messages.context_processors.messages",
            ],
        },
    },
]
Then create the folder in the same path as you see your manage.py file.
mkdir templates
Creating the base template
The below will be the base template used for the chat application, you can custmize it as per your needs.
<!DOCTYPE html>
<html>
    <head>
        <meta charset="utf-8" />
        <title>Chat App</title>
        {% load static %}
        <script src="https://unpkg.com/htmx.org@1.8.5"></script>
    </head>
    <body>
        {% if user.is_authenticated %}
            <a href="{% url 'logout' %}">Logout</a>
        {% else %}
            <a href="{% url 'login' %}">Login</a>
        {% endif %}
        <h1>Back Chat</h1>
        {% block base %}
        {% endblock %}
    </body>
</html>
We have included the htmx package as the script into this template as we will be using it in the actual part of chat application.
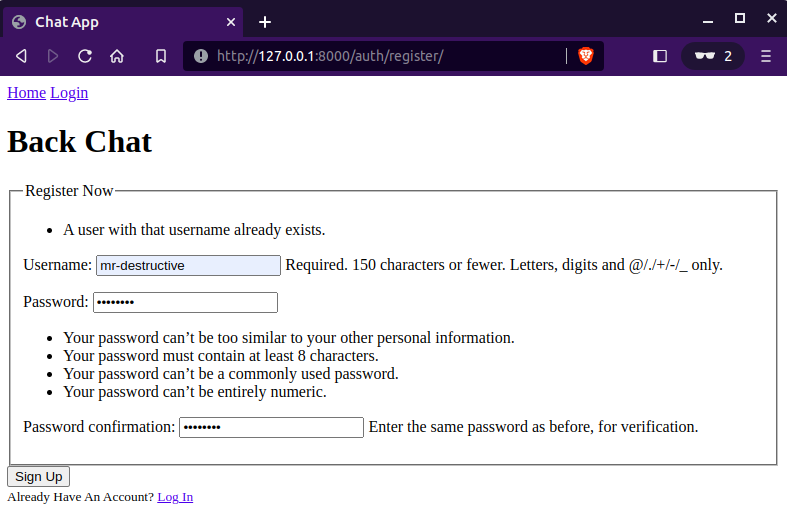
Creating the Register Template
# templates / accounts / register.html


{% extends 'base.html' %}
{% block base %}
    <div class="content-section">
        <form method="POST">
            {% csrf_token %}
            <fieldset class="form-group">
                <legend class="border-bottom mb-4">Register Now</legend>
                {{ form.as_p }}
            </fieldset>
            <div class="form-group">
                <button class="btn btn-outline-info" type="submit">Sign Up</button>
            </div>
        </form>
        <div class="border-top pt-3">
            <small class="text-muted">
            Already Have An Account? <a class="ml-2" href="{% url 'login' %}">Log In</a>
            </small>
        </div>
    </div>
{% endblock %}
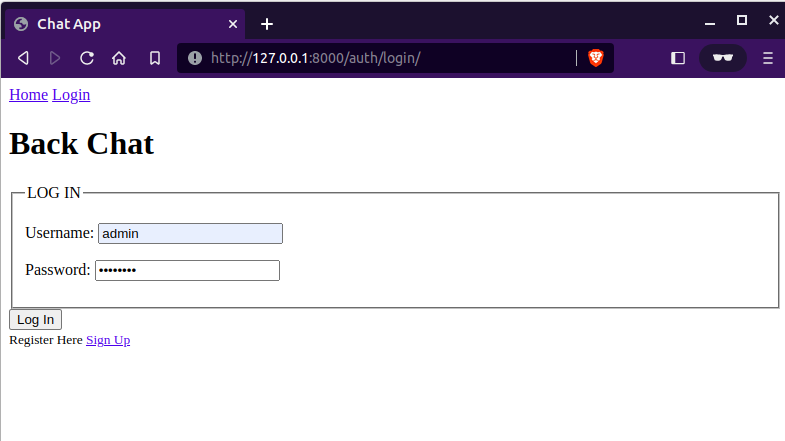
Creating the Login Template
# templates / accounts / login.html


{% extends 'base.html' %}
{% block base %}
    <div class="content-section" id="login">
        <form method="POST" >
            {% csrf_token %}
            <fieldset class="form-group">
                <legend class="border-bottom mb-4">LOG IN</legend>
                {{ form.as_p }}
            </fieldset>
            <div class="form-group">
                <button class="btn btn-outline-info" type="submit">Log In</button>
            </div>
        </form>
        <div class="border-top pt-3">
            <small class="text-muted">
                Register Here <a class="ml-2" href="{% url 'register' %}">Sign Up</a>
            </small>
        </div>
    </div>
{% endblock %}
Creating the Logout Template
# templates / accounts / logout.html


{% extends 'base.html' %}
{% block base %}
    <h2>You have been logged out</h2>
    <div class="border-top pt-3">
        <small class="text-muted">
            <a href="{% url 'login' %}">Log In Again</a>
        </small>
    </div>
{% endblock %}
Install and setup channels
We will be using channels to create long-running connections, it is a wrapper around Django's asynchronous components and allows us to incorporate other protocols like web sockets and other asynchronous protocols.
So, we will be using the Django channels package that will allow us to use the WebSocket protocol in the chat application. WebSocket is a communication protocol(set of rules and standards to be followed) that allows both the client and server to send and receive messages(communication).
To install Django channels, we can use pip and install channels with daphne which will be used as the web server gateway interface for asynchronous web applications.
pip install -U channels["daphne"]
So this will install the latest version of channels and daphne. We now have channels in our Django project, we simply need to configure the CHANNEL_LAYER config for specifying the backend used that can be Redis, In-Memory, or others. We need to add channels , daphne to the INSALLED_APPS config of the project. Make sure the daphne app is on top of the applications list.
# backchat/settings.py

...
...

INSALLED_APPS = [
    "daphne",
    ...
    ...
    "channels",
]


ASGI_APPLICATION = "backchat.asgi.application"

...
...

# For InMemory channels

CHANNEL_LAYERS = {
    'default': {
        "BACKEND": "channels.layers.InMemoryChannelLayer",
    }
}


# For Redis

CHANNEL_LAYERS = {
    "default": {
        "BACKEND": "asgi_redis.RedisChannelLayer",
        "CONFIG": {
            "hosts": [("redis-host-url", 6379)],
        },
    },
}
Redis Configuration (Optional)
You can either use the InMemoryChannelLayer or you can use them RedisChannelLayer for the backend of the chat app. There are other types of backends like Amazon SQS services, RabbitMQ, Kafka, Google Cloud Pub/Sub, etc. I will be creating the app with only the InMemoryChannelLayer but will provide a guide for redis as well, both are quite similar and only have a few nuances.
We need to install channels_redis it for integrating redis in the Django project with channels.
pip install channels_redis
So, this will make the channels_redis package available in the project, we use this package for real-time storage, in the case of the chat app, we might use it for storing messages or room details, etc.
Creating the Chat App
Further, we now can create another app for handling the rooms and chat application logic. This app will have its own models, views, and URLs. Also, we will define consumers and routers just like views and URLs but for asynchronous connections. More on that soon.
So, let's create the chat app.
python manage.py startapp chat
Then we will add the chat app to the INSALLED_APPS config.
# backchat/settings.py

INSALLED_APPS = [
    ...
    ...,
    "chat",
]
So, this will make sure to load the chat app in the project. Whenever we run any commands like migrations or running the server, it keeps the app in the INSALLED_APPS checked up.
Defining models
This is optional, but we'll do it for since we are making a Django app. We already have an auth system configured, adding rooms and authorizing the users will become easier then.
So, let's create the models for the chat app which will be the Room.
# chat/models.py


from django.db import models
from accounts.models import User

class Room(models.Model):
    name = models.CharField(max_length=128)
    slug = models.SlugField(unique=True)
    users = models.ManyToManyField(User)

    def __str__(self):
        return self.name


class Message(models.Model):
    room = models.ForeignKey(Room, on_delete=models.CASCADE)
    user = models.ForeignKey(User, on_delete=models.CASCADE)
    message = models.TextField()
    created_at = models.DateTimeField(auto_now_add=True)

    def __str__(self):
        return (
            self.room.name + " - " +
            str(self.user.username) + " : " +
            str(self.message)
        )
So, we simply have the name which will be taken from the user, and the slug which will be served as the URL to the room. The users are set as ManyToManyField since one room can have multiple users and a user can be in multiple rooms. Also we are creating the model Message that will be storing the room and the user as the foreign key and the actual text as the message, we can improve the security by encrypting the text but it's not the point of this article.
We have set the created_at the field which will set the time when the object was created. Finally, the dunder string method is used for representing the message object as a price of the concatenation of strings of room name, username, and the message. This is useful for admin stuff as it makes it easier to read the object rather than the default id.
Now, once the models are designed we can migrate the models into the database.
python manage.py makemigrations
python manage.py migrate
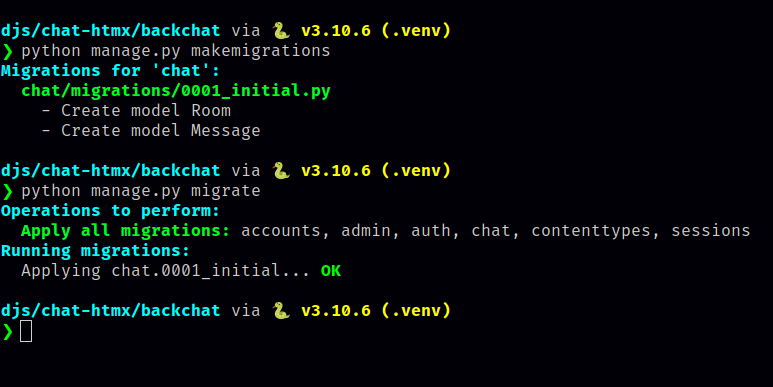
We now have a decent model structure for the chat application. We can now start the crux of the application i.e. consumers and routing with channels.
Writing consumers and routers for WebSockets
So, we start with the bare bones provided in the tutorial on the channel documentation. We create a class (consumer) called ChatConsumer which inherits from the AsyncWebsocketConsumer provided by the channels.generic.websocket module. This has a few methods like connect, disconnect, and receive. These are the building blocks of a consumer. We define these methods as they will be used for communication via the WebSocket protocol through the channels interface.
In the following block of code, we are essentially doing the following:
Accepting connection on the requested room name
Sending and Receiving messages on the room/group
Closing the WebSocket connection and removing the client from the room/group
# chat/consumers.py


import json

from asgiref.sync import sync_to_async
from channels.generic.websocket import AsyncWebsocketConsumer

from chat.models import Room, Message


class ChatConsumer(AsyncWebsocketConsumer):
    async def connect(self):
        self.room_name = self.scope["url_route"]["kwargs"]["room_slug"]
        self.room_group_name = f"chat_{self.room_name}"
        self.user = self.scope["user"]

        await self.channel_layer.group_add(
            self.room_group_name, self.channel_name
        )

        await self.accept()

    async def disconnect(self, close_code):
        await self.channel_layer.group_discard(
            self.room_group_name, self.channel_name
        )

    async def receive(self, text_data):
        text_data_json = json.loads(text_data)
        message = text_data_json["message"]
        username = self.user.username

        await self.channel_layer.group_send(
            self.room_group_name,
            {
                "type": "chat_message",
                "message": message,
                "username": username,
            }
        )

    async def chat_message(self, event):
        message = event["message"]
        username = event["username"]

        await self.send(
            text_data=json.dumps(
                {
                    "message": message,
                    "username": username
                }
            )
        )
Accept the WebSocket connection
Here, room and group more or less mean the same thing but are different in different contexts. For instance, the group refers to the collection of clients which are connected to a channel(communication between consumer and web socket) and the Room is referring to the collection of clients connected to a single connection stream like a literal room. So we can say, the group is a technical term and the room is more of a layman's term for the same thing.
The method connect is called when the client establishes a websocket connection. When that happens, the function gets the room slug from the URL of the client and stores room_name which is a string. It creates a separate variable called room_group_name by prepending the chat_ string to the room_name, it also gets the currently logged-in user from the request. It then adds the channel_name to the group named room_group_name. The channel_name is a unique identifier to the connection/consumer in the channel. By adding the channel_name, the consumer then can broadcast the message to all the channels within the group. Finally, the function accepts the connection, and a webcoket connection is established from both ends, connection is sent from the client and is now accepted from the backend.
Disconnect from the WebSocket connection
When the client sends a close connection request to the server, the disconnect method is triggered and it basically removes the channel_name from the group i.e. the group name room_group_name whatever the string it happens to be. So, it basically removes the client from the broadcast group and hence it can't receive or send messages through the websocket since it has been closed from both ends.
If you would have paid attention to the close_code in-method parameter, it is not being used currently. However, we can use it for checking why the connection was closed, as the close_code is a numeric value just like the status code in the web request for letting the server know the reason for disconnecting from the client.
Receive a message from the WebSocket connection
The recieve method is the core of the consumer as it is responsible for all the logic and parsing of the message and broadcasting of the messages from the clients to the group channels. The function takes in a parameter called text_data and it is sent from the client through websocket, so it is JSON content. We need to get the actual message from the JSON object or any other piece of content from the client. So, we deserialize (convert the JSON object to python objects) the received payload, and get the value from the key message. The key is the input name or id from the client sending the request through the web socket, so it can be different depending on the frontend template(we'll see the front end soon as well).
We get the user from the scope of the consumer as we previously initialized it in the connect method. This can be used for understanding which user has sent the message, it will be used later on as we send/broadcast the message to the group.
Now, the final piece in the receive method is the channel_layer.group_send method, this method as the name suggests is used to send or broadcast the received message to the entire group. The method has two parameters:
The name of the group
The JSON body containing the message and other details
The method is not directly sending the message but it has a type key in the JSON body which will be the function name to call. The function will simply call the other funciton mentioned in the type key in the dict. The following keys in the dict will be the parameters of that funciton. In this case, the funciton specified in the type key is chat_message which takes in the event as the parameter. This event will have all the parameters from the group_send method.
So, the chat_message will load in this message, username, and the room name and then call the send method which actually sends the message as a JSON payload to the WebSocket connection which will be received by all the clients in the same group as provided in the room_group_name string.
Adding Routers for WebSocket connections
So, till this point have consumers, which are just like views in terms of channels. Now, we need some URL routes to map these consumers to a path. So, we will create a file/module called routing.py which will look quite similar to the urls.py file. It will have a list called websocket_urlpatterns just like urlpatterns with the list of path. These paths however are not http routes but will serve for the WebSocket path.
# chat / routing.py


from django.urls import path

from chat import consumers

websocket_urlpatterns = [
    path('chat/<str:room_slug>/', consumers.ChatConsumer.as_asgi()),
]
In the above code block, we have defined a URL for the web socket with the path as /chat/<room_slug> where room_name will be the slug for the room. The path is bound with the consumer-defined in the consumers.py module as ChatConsumer. The as_asgi method is used for converting a view into an ASGI-compatible view for the WebSocket interface.
Setting up ASGI Application
We are using the ASGI application config rather than a typical WSGI application which only works one request at a time. We want the chat application to be asynchronous because multiple clients might send and receive the messages at the same time, we don't want to make a client wait before the server process a message from another client, that's just the reason we are using WebSocket protocol.
So, we need to also make sure, it makes the http request and also add our websocket config from the chat app we created in the previous sections. So, inside the asgi.py file in the project config module, we need to make some changes to include the chat application configurations.
# backchat / asgi.py


import os
from django.core.asgi import get_asgi_application
from channels.auth import AuthMiddlewareStack
from channels.routing import ProtocolTypeRouter, URLRouter

os.environ.setdefault('DJANGO_SETTINGS_MODULE', 'backchat.settings')

from chat import routing


application = ProtocolTypeRouter({
    'http': get_asgi_application(),
    "websocket":AuthMiddlewareStack(
        URLRouter(
            routing.websocket_urlpatterns
        )
    )
})
We will override the application config which is a component used for routing different types of protocols for the ASGI application. We have set the two keys, http and websocket in our application. The http type of requests will be served with the get_asgi_application application which is used for running the application in an ASGI environment.
For websocket type of requests, we are setting the AuthMiddlewareStack which helps in authenticating the users requesting the WebSocket connection and allows only authorized users to make a connection to the application. The URLRouter is used for mapping the list of URL patterns with the incoming request. So, this basically serves the request URL with the appropriate consumer in the application. We are parsing in the websocket_urlpatterns as the list of URLs that will be used for the WebSocket connections.
Now, we run the server, we should be seeing the ASGI server serving our application rather than the plain WSGI application.
$ python manage.py runserver

Watching for file changes with StatReloader
Performing system checks...

System check identified no issues (0 silenced).
February 05, 2023 - 09:22:45
Django version 4.1.5, using settings 'backchat.settings'
Starting ASGI/Daphne version 4.0.0 development server at http://127.0.0.1:8000/
Quit the server with CONTROL-C.
The application is not complete yet, it might not have most components working functional yet. So, we'll now get into making the user interfaces for the application, to create, join, and view rooms in the application.
Adding Views for Chat Rooms
We will have a couple of views like create room page, the join room page, and the chat room page. We will define each view as a distinct view and all of them will require authenticated users.
# chat / views.py


import string
import random
from django.contrib.auth.decorators import login_required
from django.shortcuts import render, reverse, redirect
from django.utils.text import slugify
from chat.models import Room


@login_required
def index(request, slug):
    room = Room.objects.get(slug=slug)
    return render(request, 'chat/room.html', {'name': room.name, 'slug': room.slug})

@login_required
def room_create(request):
    if request.method == "POST":
        room_name = request.POST["room_name"]
        uid = str(''.join(random.choices(string.ascii_letters + string.digits, k=4)))
        room_slug = slugify(room_name + "_" + uid)
        room = Room.objects.create(name=room_name, slug=room_slug)
        return redirect(reverse('chat', kwargs={'slug': room.slug}))
    else:
        return render(request, 'chat/create.html')

@login_required
def room_join(request):
    if request.method == "POST":
        room_slug = request.POST["room_slug"]
        room = Room.objects.get(slug=room_slug)
        return redirect(reverse('chat', kwargs={'slug': room.slug}))
    else:
        return render(request, 'chat/join.html')
In the above views module, we have added 3 views namely index as the room page, room_create for the room creation page, and the room_join for the room join page. The index view is a simple get request to the provided slug of the room, it gets the slug from the URL from the request and fetches an object of the room associated with that slug. Then it renders the room template with the context variables like the name of the room and the slug associated with that room.
The room_create view is a simple two-case view that either can render the room creation page or process the submitted form and create the room. Just like we used in the register view in the accounts app. When the user will send a GET request to the URL which we will map to /create/ shortly after this, the user will be given a form. So, we will render the create.html template. We will create the html template shortly.
If the user has sent a POST request to the view via the /create URL, we will fetch the name field in the sent request and create a unique identifier with the name of the room. We will slugify the concatenation of the name with the uid and will set it as the slug of the room. We will then simply create the room and redirect the user to the room page.
The room_join view also is a two-case view, where the user can either request the join room form or send a slug with the form submission. If the user is requesting a form, we will render the join.html template. If the user is submitting the form, we will fetch the room based on the slug provided and redirect the user to the room page.
So, the room_join and room_create views are quite similar, we are fetching an already existing room in the case of the join view and creating a new instance of room in the create view. Now, we will connect the views to the URLs and finally get to the templates.
Connecting Views and URLs
We have three views to route to a URL. But we will also have one additional URL which will be the home page for the application, on that page the user can choose to either join or create a room. We have the room creation, join the room and the room view to be mapped in this URL routing of the app.
# chat / urls.py


from django.urls import path
from django.views.generic import TemplateView
from chat import views


urlpatterns = [
    path("", TemplateView.as_view(template_name="base.html"), name='index'),
    path("room/<str:slug>/", views.index, name='chat'),
    path("create/", views.room_create, name='room-create'),
    path("join/", views.room_join, name='room-join'),
]
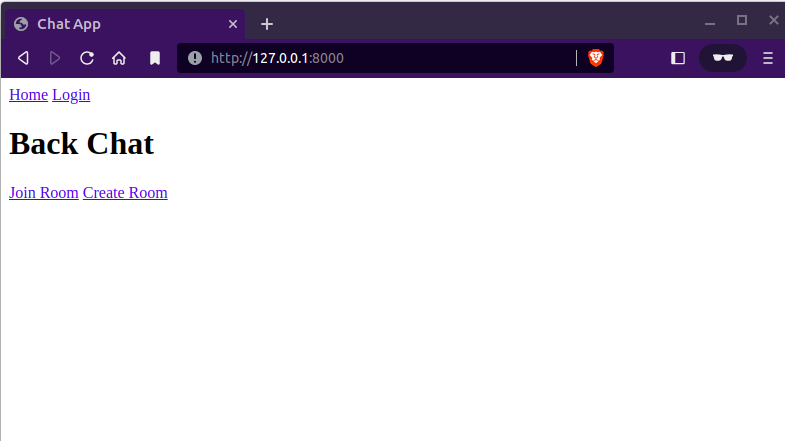
So, the first route is the home page view called index, we have used the TemplateView which will simply render the template provided. We don't have to create a separate view for just rendering a template. We already have defined the base.html template while setting up the accounts app. This will be the same template, we will add some more content to the template later on. The URL mapped is the / since we will add the URLs of this app to the project URLs with an empty "" path.
The second route is used for the room index page, i.e. where the user will be able to send and receive messages. The path is assigned as /room/<str:slug>/ indicating a parameter called slug of type string will be used in accessing a particular room. The URL will be bound to the index view that we created in the views file, which fetches the room based on the slug, so here is where the slug will be coming from. The name of the URL-View route will be chat but you can keep it as per your requirements. The URL name is really handy for use in the templates.
The third route is for the room creation page. The /create/ URL will be bound to the room_create view, as we discussed, it will serve two purposes, one to render the form for creating the room, and the other for sending a POST request to the same path for the creating the Room with the name provided. The name is not required but helps in identifying and making it user-friendly. The name of this URL is set as room-create.
The final route is for joining the room, the /join/ URL will be triggering the room_join view. Similar to the room-create URL, the URL will render the join room form on a GET request, fetch the room with the provided slug and redirect to the room page. Here, the slug field in the form will be required for actually finding the matching room. The name of the URL route is set as room-join.
We now add the URLs from the chat app to the project URLs. This will make the / as the entry point for the chat application URLs.
# backchat / urls.py


from django.contrib import admin
from django.urls import path, include

urlpatterns = [
    path("admin/", admin.site.urls),
    path("auth/", include('accounts.urls')),
    path("", include('chat.urls')),
]
Hence the process is completed for the backend to process the message, it then is dependent on the client to process and render the message.
Till HTMX was not a thing!
We won't have to write a single line of javascript to receive and handle the WebSocket connection!
Creating Templates and adding htmx
We now move into the actual frontend or creating the template for actually working with the rooms and user interaction. We will have three pieces of templates, a room creates the page, a room join page, and a room chat page. As these template names suggest, they will be used for creating a room with the name, joining the room with the slug, and the room chat page where the user will send and receive messages.
Let/s modify the base template first.
<!DOCTYPE html>
<html>
    <head>
        <meta charset="utf-8" />
        <title>Chat App</title>
        {% load static %}
        <script src="https://unpkg.com/htmx.org@1.8.5"></script>
    </head>
    <a href="{% url 'index' %}">Home</a>
        {% if user.is_authenticated %}
            <a href="{% url 'logout' %}">Logout</a>
        {% else %}
            <a href="{% url 'login' %}">Login</a>
        {% endif %}
    <body hx-ext="ws">
        <h1>Back Chat</h1>
        {% block base %}
            <a href="{% url 'room-join' %}">Join Room</a>
            <a href="{% url 'room-create' %}">Create Room</a>
        {% endblock %}
    </body>
</html>
Create Room Template
We will have to render the form with a field like name for setting it as the name of the room, it is not required but again, it makes it easier for the user to find the name of the room a bit more friendly than random characters.
# templates / chat / create.html


{% extends 'base.html' %}

{% block base %}
    <form method='post' action='{% url 'room-create' %}'>
        {% csrf_token %}
        <input name='room_name' id='room_name' placeholder='Room Name'>
        <input type='submit' id="submit">
    </form>
{% endblock %}
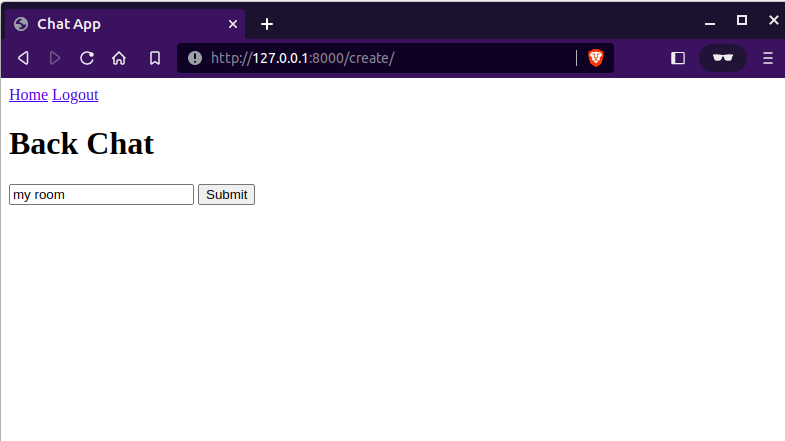
The template is inherited from the base.html template and we render a form with the room_name input. The form will be submitted to the URL named room-create hence it will send a POST request to the server where it will create the room and further process the request.
Join Room Template
The join room template is similar to the create room template except it gets the slug of the room from the user rather than the name which is not a unique one to join the room.
# templates / chat / join.html


{% extends 'base.html' %}

{% block base %}
    <form method='post' action='{% url 'room-join' %}'>
        {% csrf_token %}
        <input name='room_slug' id='room_slug' required='true' placeholder='Room Code'>
        <input type='submit' id="submit">
    </form>
{% endblock %}
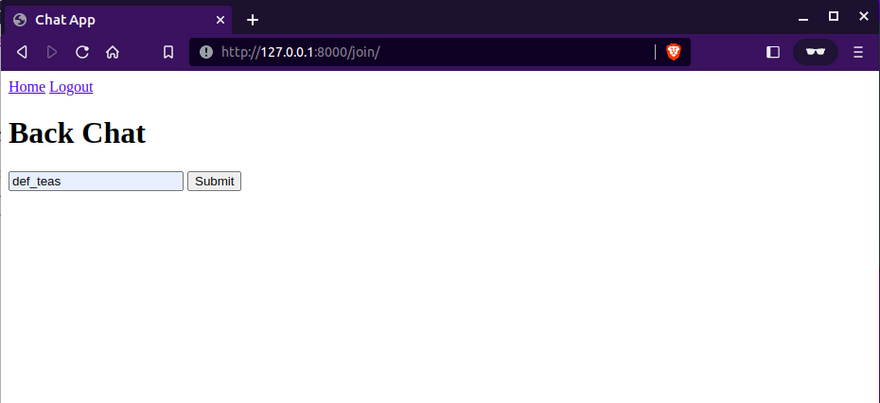
The form will be submitted to the URL named room-join hence it will send a POST request to the server where it will fetch the room and further process the request.
Room Template (HTMX code)
Now, time for the actual ingredient in the application, some HTMX magic!
This template, as the two templates above inherit from the base template, that's the same thing. But it has a special div with the attribute hx-ws which is used for using attributes related to the web socket in the htmx library. The connect value is used for connecting to a WebSocket. The value of the attribute must be set to the URL of the WebSocket to be connected. In our case, it is the URL path from the routing app as /chat/<room_slug>/. This simply will connect the client to the WebSocket from the backend. The other important attribute is the send which is used for sending a message to the connected web socket.
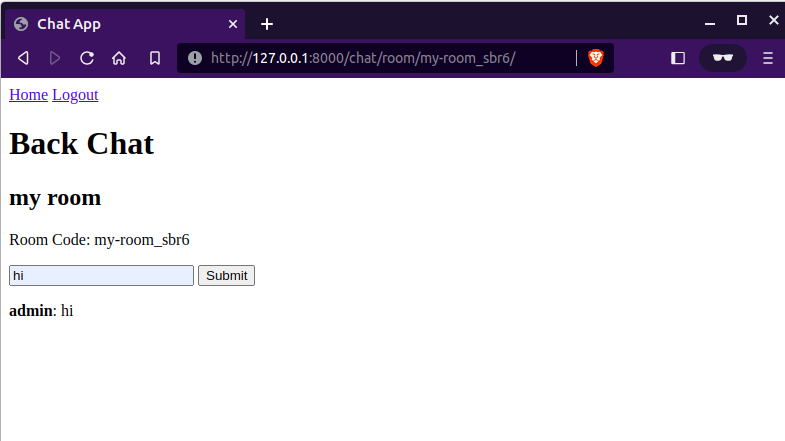
# templates / chat / room.html


{% extends 'base.html' %}

{% block base %}
    <h2>{{ name }}</h2>
    <div hx-ws="connect:/chat/{{ slug }}/">
        <form hx-ws="send:submit">
            <input name="message">
            <input type="submit">
        </form>
     </div>
     <div id='messages'></div>
{% endblock %}

NOTE: The template has a div with the id messages which will be very important for sending the messages from the WebSocket to the client, so more on that when we use the HTMX part.
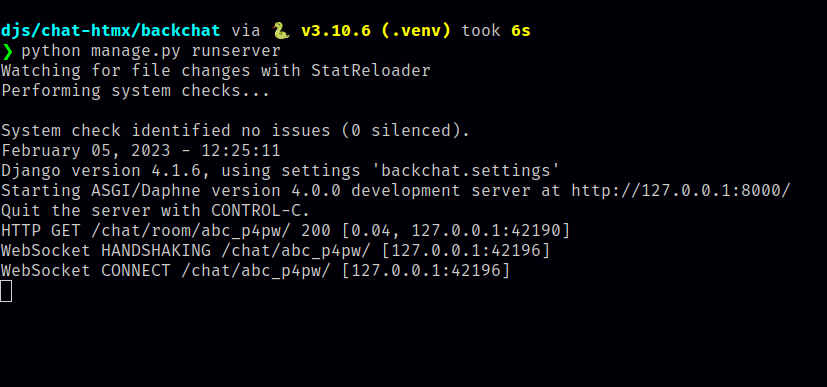
For testing this template, you can create a room, and that will redirect you to the room template as we have seen in the views for the room creation. If you see something like WebSocket CONNECT it means, that the application has been able to establish a WebSocket connection to the backend, and we can be ready to accept messages and other stuff.
HTTP GET /chat/room/def_teas/ 200 [0.03, 127.0.0.1:38660]
WebSocket HANDSHAKING /chat/def_teas/ [127.0.0.1:38666]
WebSocket CONNECT /chat/def_teas/ [127.0.0.1:38666]
Till this point, we should have a running and almost complete application, though we just have a minor part missing that will be the most important part.
Sending HTML response from backend for htmx
We will be sending a fragment of HTML from the backend when the user sends a message, to broadcast it to the group. Let's make some changes to the application, especially to the receive method in the ChatConsumer of the chat application.
# chat / consumers.py


    ...
    ...

    async def receive(self, text_data):
        text_data_json = json.loads(text_data)
        message = text_data_json["message"]
        user = self.user
        username = user.username

        await self.channel_layer.group_send(
            self.room_group_name,
            {
                "type": "chat_message",
                "message": message,
                "username": username,
            }
        )

    async def chat_message(self, event):
        message = event["message"]
        username = event["username"]

        # This is the crucial part of the application
        message_html = f"<div hx-swap-oob='beforeend:#messages'><p><b>{username}</b>: {message}</p></div>"
        await self.send(
            text_data=json.dumps(
                {
                    "message": message_html,
                    "username": username
                }
            )
        )

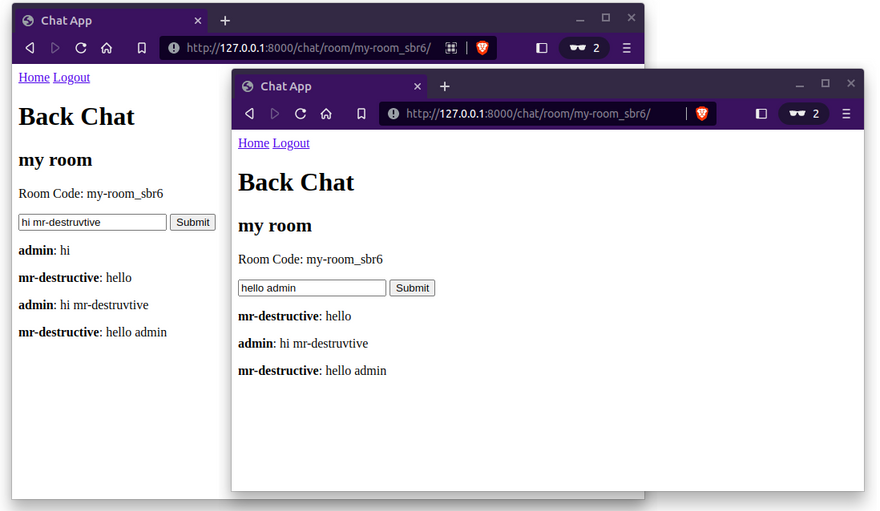
In the above snippet, we are just changing the final message object to include some HTML just simple. The HTML however has home htmx attributes like hx-swap-oob which will just update the specified DOM element to the content in the div. In this case, the DOM element is #message which is the id message present in the room template. We basically add the username and the message into the same id by appending it to the element. That's it, it would work and it would start showing the messages from the connected clients and broadcast them as well.
There are some things to keep in mind while using htmx in the long run especially when the htmx 2.0 is released, it will have ws as a separate extension. It will have a bit of a different syntax than above. I have tried the latest version but doesn't seem to work. I'll just leave a few snippets for your understanding of the problem.
# templates / chat / room.html


{% extends 'base.html' %}

{% block base %}
    <h2>{{ name }}</h2>
    <div hx-ext="ws" ws-connect="/chat/{{ slug }}/">
        <form ws-send>
            <input name="message">
        </form>
    </div>
    <div id='messages'></div>
{% endblock %}
I have added, the hx-ext as ws which is a htmx extension for websocket. This extension has websocket-specific attributes like ws-connect and ws-send. I have tried a combination like changing the htmx versions, adding submit value as the ws-send attribute, etc, but no results yet. I have opened a discussion on GitHub for this issue, you can express your solution or views there.
Adding some utility features for the chat app
We can save messages, add and remove the users from the room according to the connection, and other stuff that can make this a fully-fledged app. So, I have made a few changes to the chat consumers for saving the messages and also updating the room with the users in the room.
# chat / consumers.py


import json

from asgiref.sync import sync_to_async
from channels.generic.websocket import AsyncWebsocketConsumer

from chat.models import Room, Message


class ChatConsumer(AsyncWebsocketConsumer):
    async def connect(self):
        self.room_name = self.scope["url_route"]["kwargs"]["room_slug"]
        self.room_group_name = "chat_%s" % self.room_name
        self.user = self.scope["user"]

        await self.channel_layer.group_add(
            self.room_group_name, self.channel_name
        )

        # Add the user when the client connects
        await self.add_user(self.room_name, self.user)

        await self.accept()

    async def disconnect(self, close_code):

        # Remove the user when the client disconnects
        await self.remove_user(self.room_name, self.user)

        await self.channel_layer.group_discard(
            self.room_group_name, self.channel_name
        )

    async def receive(self, text_data):
        text_data_json = json.loads(text_data)
        message = text_data_json["message"]
        user = self.user
        username = user.username
        room = self.room_name

        # Save the message on recieving
        await self.save_message(room, user, message)

        await self.channel_layer.group_send(
            self.room_group_name,
            {
                "type": "chat_message",
                "message": message,
                "username": username,
            }
        )

    async def chat_message(self, event):
        message = event["message"]
        username = event["username"]


        message_html = f"<div hx-swap-oob='beforeend:#messages'><p><b>{username}</b>: {message}</p></div>"
        await self.send(
            text_data=json.dumps(
                {
                    "message": message_html,
                    "username": username
                }
            )
        )

    @sync_to_async
    def save_message(self, room, user, message):
        room = Room.objects.get(slug=room)
        Message.objects.create(room=room, user=user, message=message)

    @sync_to_async
    def add_user(self, room, user):
        room = Room.objects.get(slug=room)
        if user not in room.users.all():
            room.users.add(user)
            room.save()

    @sync_to_async
    def remove_user(self, room, user):
        room = Room.objects.get(slug=room)
        if user in room.users.all():
            room.users.remove(user)
            room.save()
So, we have created a few methods like save_message, add_user, and remove_user which all are synchronous methods but we are using an asynchronous web server, so we add in the sync_to_async decorator which wraps a synchronous method to an asynchronous method. Inside the methods, we simply perform the database operations like creating a message object, and adding or removing the user from the room.
That's only a few features that I have added, you can add to this application and customize them as per your needs.
The code for this chat app is provided in the GitHub repository.
Conclusion
So, from this post, we were able to create a simple chat app (frontendless) with Django and htmx. We used Django channels and HTMX to make a chat application without the need to write javascript for the client-side connection. Hope you found this tutorial helpful, do give your feedback and thoughts on it, I'll be eager to improve this post. Thank you for your patient listening. Happy Coding :)


Latest comments (1)
Building a chat application with Django and HTMX is a great way to leverage modern tools for real-time communication. While working on such projects, I often take breaks to explore other tech, like streaming setups. For those interested in IPTV services, you might want to comprar IPTV to experience seamless entertainment alongside your coding journey.