In this article, we are going to see what the heck is Sapper and how to create a simple sapper app and finally deploy it on Netlify. So let's grab a cup of coffee and start coding.
TL;DR
What is Sapper?
If you are a Svelte developer and want to create fast and robust server-side rendered app in Svelte then you can easily create this app using a new framework called Sapper. Just like for creating server-side rendering application in React we have a very popular framework called Next.JS. Similarly, Sapper also stands for Svelte app maker which is a framework for building high-performance server-side rendering application in Svelte. As per Sapper docs:
Sapper is a framework for building web applications of all sizes, with beautiful development experience and flexible filesystem-based routing.
Unlike single-page apps, Sapper doesn't compromise on SEO, progressive enhancement or the initial load experience — but unlike traditional server-rendered apps, navigation is instantaneous for that app-like feel.
To know more aboutSapper in-depth & which problem it solves you can read this article. So in this article, we are just creating simple sapper and deploy it on Netlify. To learn the different components of Sapper and how to create beautiful apps then Sapper has nice documentation which you can check here.
To understand what the heck is Svelte in detailed and how to create a simple Todo app, you can check my below article:

What is Netlify?
Netlify is a next-generation web hosting platform which provides everything that you need to build fast, modern websites such as CI/CI, serverless functions, etc. I recommend deploying it on Netlify because it supports project structures like this and can quickly create deployments.
Below are some of the benefits of Netlify:
- You can create a free account for your projects.
- Very less pricing with lots of features. You can check pricing here.
- Provides free SSL certificates and has built-i DNS managements.
- You want to store data then Netlify also has a Netlify CMS.
Create a simple Sapper Application
Prerequisites
- You need to have installed the latest stable version of Node JS and NPM.
- Basic understanding of HTML, CSS, and JavaScript
- Knowledge of Svelte is an added advantage
The simplest way to create a sapper app is by cloning the sapper-template repo with degit. Using this template we can create Sapper app with two the popular module bundlers i.e rollup.js and Webpack. You can choose whatever module bundler in which you are comfortable with it.
Using Rollup
npx degit "sveltejs/sapper-template#rollup" saper-netlify-app
Using Webpack
npx degit "sveltejs/sapper-template#webpack" saper-netlify-app
Then navigate to the new project folder.
cd my-app
After that install all the dependencies:
npm install
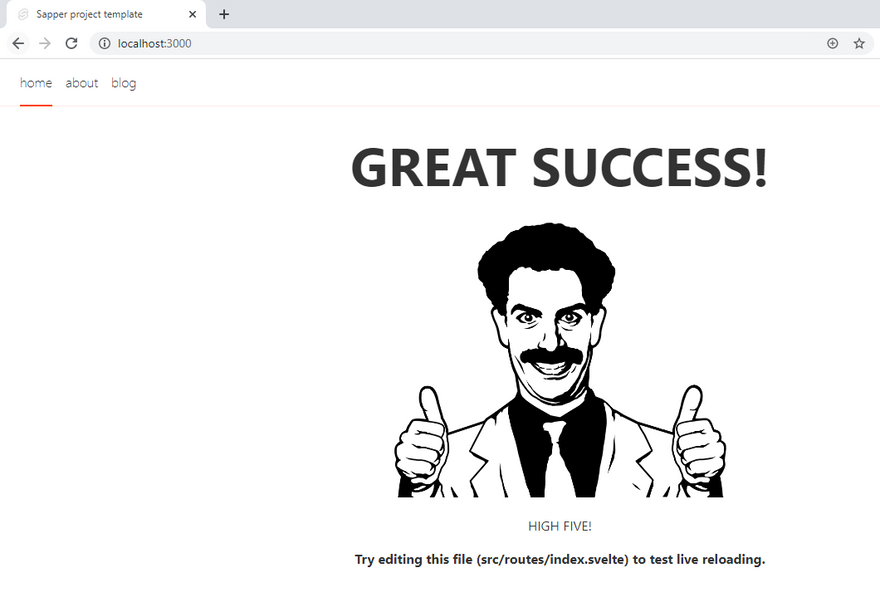
To run the application run the below command:
npm run dev
The above command starts dev server so open browser and navigates to http://localhost:3000
Open the package.json file and see the script section.
"scripts": {
    "dev": "sapper dev",
    "build": "sapper build --legacy",
    "export": "sapper export --legacy",
    "start": "node __sapper__/build",
    "cy:run": "cypress run",
    "cy:open": "cypress open",
    "test": "run-p --race dev cy:run"
  }
-
dev: to start the app in development mode and also start watching files -
build: build the app in production mode -
export: export static version of the app.(We will use this command to deploy app) -
start: start the app which you have build in production mode -
cy:run,cy:open&testare used for running Cypress test cases.
Now push this new app into Git (you can choose other software development platform like Gitlab, Bitbucket). Follow below steps for commit and push the project into Git.
git init
git add .
git commit -m "first commit"
git remote add origin <your repo address>
git push -u origin master
So we have successfully created a basic Sapper app and also pushed source code into Git.
Deploy Sapper app on Netlify
Now we have created our sapper app in the previous step. Now its time to deploy it on Netlify. If you are not already a Netlify user, first go ahead and sign up for a free account here.
Once you logged in, you will be redirected to https://app.netlify.com/. Follow the steps and link & authorize your Git account. Then you will see the New Site from Git button.

Click on the New Site for Git button. You will see below screen.
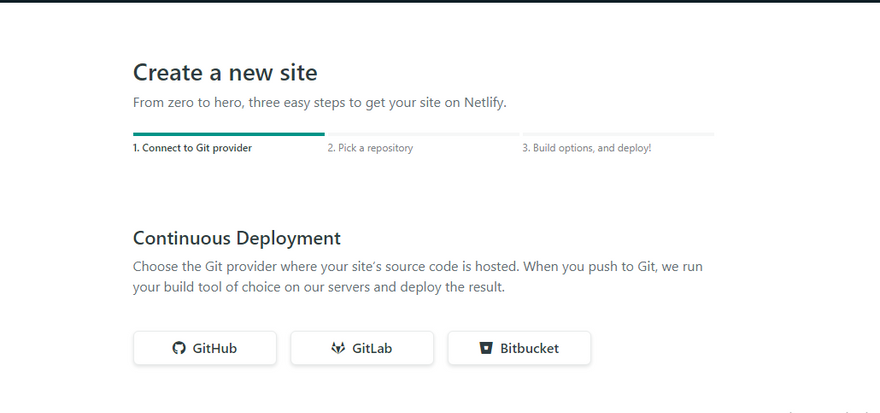
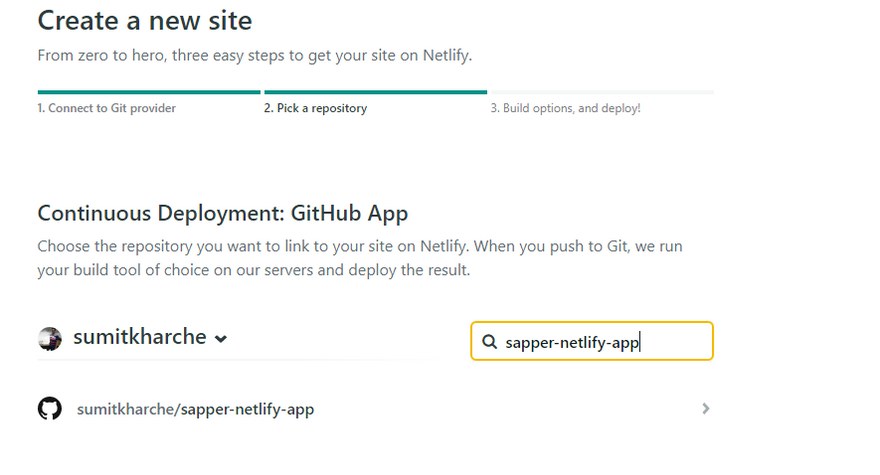
Under the Continuous Deployment section, select Github option. After that search the repo that you have created in the previous step and click on it.
After selecting repo, you have to provide a build setting as shown in below image:
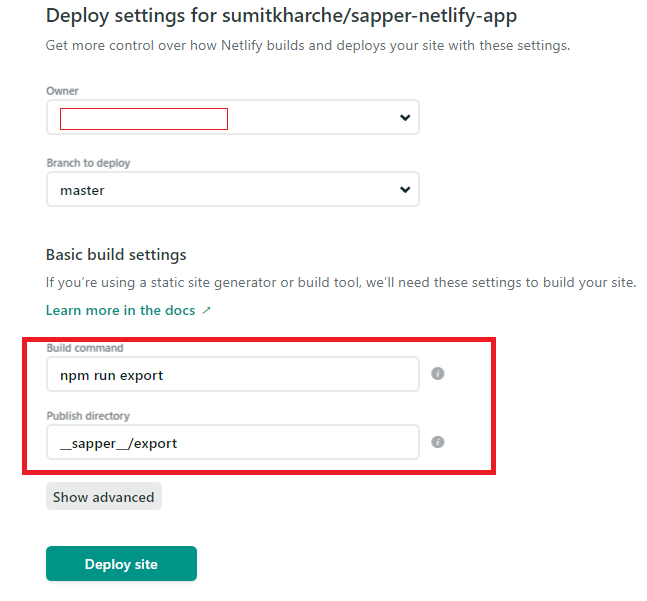
We have already seen what the npm run export command does. Now click on Deploy Site button to deploy the site on Netlify. Then wait for the build and deployment to complete. Once the deployment is done navigate to the URL to see the live Sapper.
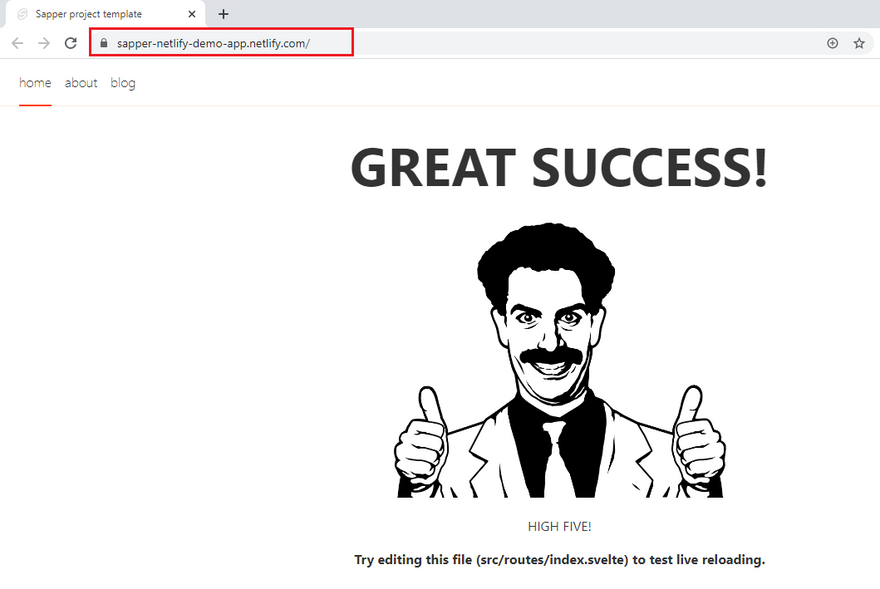
That's it. You have deployed your Sapper on Netlify.
Conclusion
In this article, I have demonstrated how to create a Sapper application. Then deployed the same application on Netlify.
I really hope that you enjoyed this article, and please do not hesitate to send me your thoughts or comments about what could I have done better.
You can follow me on twitter @sumitkharche01.
Happy Coding!

Top comments (1)
To deploy a Sapper app on Netlify, build it with npm run export and upload the output folder to Netlify. Similar to customizing menus like Firehouse subs menu prices provides detailed insights into menu offerings, pricing, and customization options, tailor your app’s settings for user needs. Ensure redirects and headers are configured to handle dynamic routes effectively.