Now that we know how to use CSS to start adding color let's put that knowledge to good use. It is time to start adding more color to a website starting with today's post. Today we will be looking at the background and border properties, the last portion of lesson 12.
I will show you how to use CSS to add borders and backgrounds to a website. I will show you how to add background colors and background images as well as how you can customize your borders.
How to add a background to a website
The background property allows developers to add any kind of background we want on our website. Before you start adding any color to your website, take a look at the current background for your site in the browser. The background color you see may seem white, but it is transparent.
While it seems white to anyone looking at a site, there is no color being used in the background at all. This is the standard default background color. There are two ways to add a background to a website.
Background color just adds any color to the background of a site. Meanwhile, the background image has an image as the background which requires some extra tips on how the image should appear on the browser. Both methods are used by developers, so it is important to know how to use both especially if you have plans for freelancing.
Using a background color
Adding a background color is much easier than adding a background image since it is very simple. Let's say I want my website to have a powder blue background. If I want to change the transparent background of my website's body to powder blue, I need to set the background property of the body tag to the color I want.
If you take a look at the sample code, all I did was set the background property to powder blue. Both color names and hexadecimal values work here so feel free to pick the method you like the most. The most important thing to see from this example is how it is written on my style sheet.
All you need to do is use the color you want, and the computer will do the rest.
h1 {
  color: #2F4F4F;
  font-family: Arial;
  font-size: 55px;
}
Once you have set the background property, it is time to check how everything looks on the browser. When you look at the image below, my browser shows a powder blue background while my text stays the same. If your background color isn't appearing, remember to double-check the color name and hexadecimal value you are using for misspellings, missing numbers, and spacing. This is the best starting place to start figuring out why color isn't working in your code.

Now it is time to talk about background images.
Background images require a little more work than background colors. When I work with background images, I find myself spending more time tweaking the image to get it looking just right on a website. Anytime we work with images, we need to have a URL that tells the computer where we can find the image.
There are two types of URLs developers use. First is the relative URL. A relative URL tells the computer where the image is in my code files. A relative URL might look like this on a style sheet.
header {
  background: url('img/my-background.jpg');
}
Inside the single quotation marks, I let the computer know the image can be found in my image folder in my code files as my-background.jpg. I put this link inside the parentheses with a URL on the outside, so the computer knows it is a link. Without this, the computer wouldn't know what I was trying to do and just keep the background the same.
==> Click here to get the image for the header example below!
Next, there is the hard link or just using a standard weblink you get from the web. I found a nice image for my header. If I wanted my header to have this background image, I would simply copy and paste the entire link inside the parentheses. This is how it would look on my style sheet.
header {
  background: url('http://s3.amazonaws.com/media.skillcrush.com/skillcrush/wp-content/uploads/2016/03/seamless-pattern-green-150.png');
}
When I check my website in the browser, the image below shows how my header looks. The header uses the image in the link as the background. Regardless of what type of URL you use, always double-check the URL you are using. Sometimes background images won't appear if the URL is incorrect or a link is bad.

What else can you do with background images?
You can use any image you want as a background. However, in many cases, you will want to do a little more customization on your image, so it looks just right in the browser. Developers can repeat an image, set a background image color, and even play with the image's position.
This will vary depending on what kind of image you are using, and even then you don't have to use all of these things on a background image. However, these bits of CSS are good to know as you work more and more with background images on your coding journey.
Repeat a background image
Sometimes a developer might want a background image to keep covering parts of a website in all different directions. This is where repeat comes in. When developers use repeat on a background image, the image will copy the image in all different directions.
Skillcrush compares repeating an image in the background just like putting tiles on a floor. If you want your background image to repeat on a website, you need to include repeat in the background property. If I wanted my background image to repeat for every section on my website, my code would look like this on my style sheet.
section {
  background: url('img/my-background.jpg') repeat;
}
When the computer sees a repeat as it translates your code, it will repeat the image in every direction. If you only want your image to repeat in certain directions, there are other options you can use. These options include no-repeat, repeat-x, and repeat-y.
No repeat won't repeat the image, appearing only once on the browser. Repeat-x will only repeat the image horizontally on the x-axis. Meanwhile, repeat-y will tell the computer to repeat the image vertically on the y-axis.
Playing with the positions on the X and Y-axis
When I work with background images, I spend a lot of my time playing with their position on a website. Skillcrush advises students to use positioning on non-repeating images. Developers can change the position of a background image using its place on the x and y-axis.
If you have worked with a coordinate graph in math class, remember the x-axis is horizontal while the y-axis is vertical. You might have plotted points using coordinates for the x and y-axis.
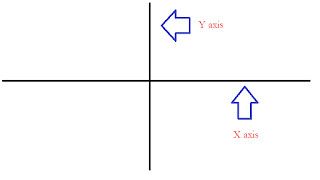
Developers use the x and y-axis in their code all the time with a few differences. On every web page, the x and y-axis start in the top left-hand corner of the site with a default value of 0. If you want to change the position of an image, all you need to do is change the x and y values of that image. The computer will then move the image to those points provided.
Take a look at this example. I want to change the position of the footer's background image. Here is how I might play with its position in the browser.
footer {
  background: url('img/my-background.jpg') no-repeat 10px 20px;
}
The code changes the position using 10px and 20px. As the code is being translated into the browser, the image would move 10 pixels to the right and 20 pixels down.
Set background image color
Finally, it is time to add even more color to a background image. You can set a background color to a background image. This works well with partially transparent background images or ones that aren't repeating.
If I want my background image for my section to have a green background color, I would just indicate the color name or hexadecimal value for the color I want. This is how my code would look on my style sheet.
section {
  background: url('img/my-background.jpg') no-repeat 10px 20px green;
}
When I check my background in the browser, the background image would have a green background to it. If your background color is covering your entire background image, double-check to see if your image is repeating and if the image is transparent.
How to add a border to a website
Backgrounds aren't the only way to use color on a website. Borders are another way developers can add color to a website. The border property allows developers to add different kinds of borders to a website.
If I wanted to add a border around everything in the main tag, I would use the border property in my code like this.
main {
  border: 2px solid #DA70D6;
}
Let's break down what is happening here. First, I set the width of the border using pixels. I don't want a thick border for this part of my website, so I went with 2px.
Next, I set the border style. The border style can be many different things. Some of these styles include dashed, dotted, groove, and ridge.
Finally, I pick the color I want for my border. I used the hexadecimal value #DA70D6 or orchid for the main border.
Now here is an image of what I should see in the browser. The border surrounds all the content in the main tag with a light purple border.

Conclusion
Backgrounds and borders are a great way of adding color to a website. Now you know how to put different borders and backgrounds on your website. You can now customize some of your background images using repeat, positioning, and color.
Websites might not always use backgrounds and borders, but these properties will come in handy as you use more CSS on your site. If your background or border isn't appearing on your site, make sure you double-check the colors and URLs you might use to start troubleshooting some of these problems. Tomorrow we'll be moving on to Lesson 13 in Skillcrush 101.
Lesson 13 is about dimensions and the box model. I will show you how to use CSS to start changing the dimensions on the website. You will learn a few more CSS properties to help you play with the size of elements on your site.
This post was originally published on April 12, 2017 on the blog The Original BritishPandaChick. I made minor changes to the original post to work here on CodeNewbie.

Oldest comments (0)