Congratulations! If you read yesterday's post and tried some of the tags, you have written your first few lines of code. That is a big accomplishment for any developer even if you simply got "Hello World!" to appear on your browser.
I started looking at Skillcrush's updated HTML & CSS course Skillcrush 101. The first week of the 3-month course is all about HTML. Before you begin writing code, you have to understand how HTML tags work and how the computer reads the tags for your website to appear in the browser.
HTML tags mark up the code on every website you see online. These tags let the computer know what everything is in the code, so it knows what needs to go on the browser. There are tons of HTML tags, but developers don't memorize these tags.
Memorization isn't as important to developers as being able to understand the code being presented in front of them. Skillcrush 101 focuses the first day on getting newbies looking at HTML and best practices for working with HTML, so they don't have problems pop up as they build websites.
The first day begins by looking at text tags that are regularly used on every website in the world. These tags include p, em, br, and much more. If you need to refresh your memory on any of these tags, feel free to revisit The Newbie's Guide to HTML post.
Today's post begins by looking at lessons 3 and 4 of Skillcrush 101. Day two continues to look at more HTML tags and the function they play on websites. Lesson 3 is all about lists and shows students how to add different types of lists to a website.
Lesson 4 shows students how to add images to a website and how to make links on a website. Skillcrush shows how to make links with text and images. By the end of this post, you will be even better at reading and understanding code. Remember, coding is a journey, and you'll understand lots more as you practice what you learn.
How to add a list to your website
Lesson 3 is all about lists. Developers are big fans of lists since they help organize content and keep things easy to read. Lists require different HTML tags from paragraph and headline tags to let the computer know what kind of list they are working with and what items are on the list.
The two list tags every newbie needs to be familiar with are ol and ul tags. The ol tag stands for ordered lists. Ordered lists number every item on the list. You might use ordered lists to create a wish list on Amazon or give directions.
The ul tag tells the computer you are making an unordered list. Unordered lists use bullet points instead of numbers. Unordered lists are great for to-do lists as well as listing features or a list of benefits an online business gives customers.
To make any list on a website, you need to use li tags. The li tag means list item and is used on every single list item on your list. This lets the computer know which items go on the list, so they get numbers or bullet points.
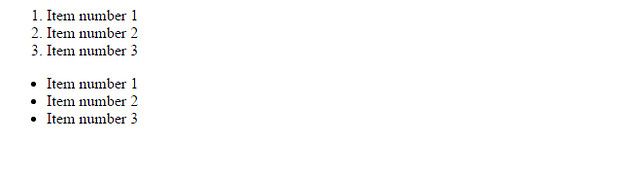
Here is how the code looks behind the scenes.
<ol>
<li>Item number 1</li>
<li>Item number 2</li>
<li>Item number 3</li>
</ol>

<ul>
<li>Item number 1</li>
<li>Item number 2</li>
<li>Item number 3</li>
</ul>
Now if you look at your website in the browser, this is what you should see.
Now before you start making lists in your text editor, Skillcrush wants students to be aware of common mistakes that can often be made when building lists. If your lists aren't appearing the way they should be, you will want to revisit these tips as you double-check your code. Chances are one of these mistakes is the source of the problem.
To prevent future errors, newbies need to make sure everything is ordered correctly. This means ol or ul tags are on the outside while the li tags are inside. You don't want to mix up your tags when making lists.
The computer needs to know what kind of list you are making before you start giving list items. If the tags are mixed up, the computer will get confused and give you an error. As a reminder, you will want to double-check every tag to make sure there are opening and closing tags.
This is especially important for the list items since every list item needs an opening and closing li tag. When I started learning how to code, I often left the closing li tag off my list items which gave me errors all the time. Save yourself future troubles by making sure you open and close every list item as you build a website.
How to add images to your website
If you are coding along with these blog posts, chances are your website might look boring with just text. Enter images! Images bring lots of life to a website and are found everywhere on the web.
To put an image on a website, developers use the image tag or img tag. The image tag is different from the text tags I've talked about before because it is a self-closing tag. This means it doesn't need a closing tag at all.
To close an image tag, all you need to do is put /> at the very end. Here is how an image tag works behind the scenes on a website.
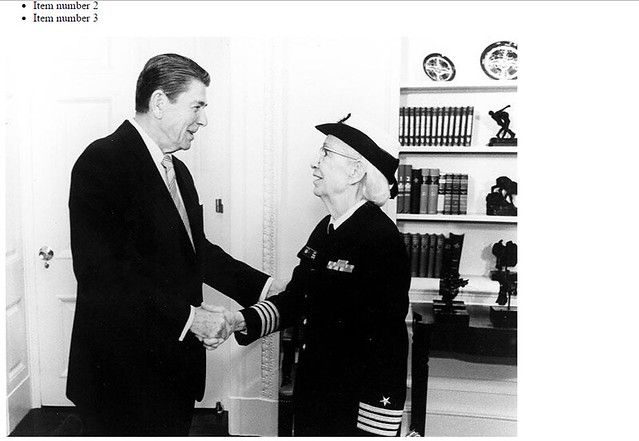
<img src="http://s3.amazonaws.com/media.skillcrush.com/skillcrush/wp-content/uploads/2012/12/grace_hopper_regan-1.jpeg" alt="my-image"/>
Image Attributes
Image tags can have a lot more information than text tags thanks to attributes. Attributes tell the computer more information about the tag. Attributes are often used with image tags to help your computer learn more about the image you are using.
The src attribute
In the example above, you'll see the attribute of src besides img. The src attribute tells the computer where the image is being stored so they can access it on the website. Images that are used on websites are stored somewhere on the internet so they can be accessed through a link.
Skillcrush recommends students create a folder of images and put it on a web server. There are many different file types for images. Skillcrush encourages students to use jpg, png, or gif file types for their websites.
Although there are other ones available, they do require more work to ensure they run on your site. Skillcrush also recommends students use images that are no larger than 1 MB. Larger file sizes require extra loading time, and users don’t want to be sitting around waiting for a page to load for very long.
Once you find an image or put an image on a web server, you will need to find the URL for the image. The URL can be found by right-clicking the image and opening it in another table to find the image's source. Finally, it is just copying and pasting the image's URL next to the source attribute.
In the example above, you will see the URL in between quotes. This will let the computer know how to access the image. If you have problems getting your image to appear on your site, start by checking the src attribute and the URL you provided as well as if you used quotation marks around the URL.
When you look at your website in the browser, your image will now appear on your website. Here is how the image looks in the browser based on the sample code I showed you earlier. Don't worry about how the image looks right now. You'll learn more about how to work with images later in CSS.
The alt attribute
The src isn't the only attribute used in image tags. The alternative attribute is very helpful for users and developers. The alternative attribute is written as alt in HTML and won't be seen on the website.
The alt attribute is used by developers to describe the image. This attribute comes in handy because it will let anyone know what your image is even if you can't see it. It is also good practice for developers to communicate with other developers about what their code is.
Without the alt attribute, other developers would have no clue what the picture is supposed to be. The alt attribute also helps developers improve SEO for your website, so you will want every image to have the alt attribute.
How to add links to a website
Everything is connected on the web thanks to links! This post is connected to a variety of coding resources thanks to the links in this post. To add a link to a website, developers use anchor tags or a tags. These tags tell the computer you will be making a link.
Following the a tag, the href attribute is used to let the computer know what URL you are linking to. The href attribute (better known as Hypertext Reference) is enclosed with quotation marks and >. Descriptive text or an image is placed between opening and closing a tags.
Take a look at the sample code below to see how I linked BritishPandaChick to my portfolio site http://britishpandachick.github.io.
<a href="http://britishpandachick.github.io">BritishPandaChick</a>
When you are making links, one of the easiest things to forget is putting descriptive text or an image in between the opening and closing a tags. I did this a lot when I started learning how to make links and would get upset when nothing appeared on the browser. If you are having any problems with your link, check the URL you used in the href attribute and what descriptive text you gave.
If you open the sample code I provided in my browser, this is what you should see.

The href attribute isn't the only important attribute to know for a tags. To get websites to open a website in a brand new tab, developers use target = "_blank" in the opening a tag. The target attribute tells the computer to open the URL provided in another tab without changing the website tab you are currently using. You will find yourself using this attribute very often as you are coding.
Conclusion
Every website you see is trying to present content in an organized easy-to-digest way while giving the website a bit of personality. Lists, images, and links are some of the ways developers can accomplish this on a website. Lists help organize text in an easy-to-read format.
Images help give a website some personality while links allow your website to be connected to other sites on the web. Lessons 3 and 4 in Skillcrush 101 do a good job explaining these concepts and identifying possible areas newbies need to look out for as they work with these tags in their code. Tomorrow I will look at lesson 5 of Skillcrush 101. Lesson 5 explains the importance of the div tag in HTML and how it works on a website.
This post was originally published on January 18, 2017 on the blog The Original BritishPandaChick. I made minor changes to the original post to work here on CodeNewbie.

Latest comments (0)