When it comes to learning how to code, things can seem overwhelming. The biggest challenge at the beginning of a coding journey is knowing where to start. When I began learning how to code, the most intimidating aspect was simply figuring out what to learn first.
Developers have different opinions on which language is the best and most important. However, most developers agree that newbies can't go wrong with learning HTML & CSS first. Every website you have seen exists thanks to HTML & CSS.
It doesn't matter if it is a blog or Google. HTML & CSS were used to make them. If you ask developers what they learn first, chances are HTML & CSS are among the first things they start with on their coding journey.
During the Skillcrush Web Designer Blueprint, HTML & CSS are covered in Skillcrush 101.
The first lesson of the course is featured in the free 10-Day Bootcamp. The course is divided into three weeks. The first-week concentrates on HTML and learning some of the most important HTML tags needed to build websites.
The second week takes a look at CSS and how it is used to style every website. The last week of the course has students building projects and even launching a website online. Recently Skillcrush updated Skillcrush 101 with new content and projects.
Therefore, the next few posts will be looking at Skillcrush 101. Today's post will look at the first two lessons in the course during week one HTML.
What is HTML?
HTML stands for HyperText Markup Language. HTML is considered one of the building blocks of the web because this language is used on every website to build websites. Without HTML, there would not be any websites.
HTML is a language made up of different tags. These tags look like the following.
<p>....</p>
<h2>...</h2>
These tags give directions to the computer and tell them what the content is.
The computer interprets the tags and puts the content on the website. HTML tags give computers lots of information in one tag, so developers must use the right tags in their code for the computer to understand. Although you don't see HTML tags when you visit a website, anyone can take a look at your code.
View Page Source/Show Page Source
Each browser has an option called either "View Page Source" or "Show Page Source" that appears when you right-click on a web page. If you click this option, you will be able to see all the code used to make a website. So if you right-clicked this web page right now, you will see lots of HTML tags that were used to make this web page work.
If you are new to code, this might seem intimidating since there is a lot of code. However, one of the best ways to get better at coding is by reading code and identifying things you understand. As you progress on your coding journey, you'll become much better at recognizing tags and what directions are being given to the computer.
Let’s Start Looking at the HTML Tags
Now that you have a little background on what HTML is, it is time to start looking at some HTML tags! While the first lesson dives into how HTML has been created and some history behind it, the lesson also starts to introduce students to relevant tags they will often be using in the browser. Most HTML tags require opening and closing tags.
Regardless if it is an opening or closing tag, HTML tags start with < before the type of tag being used and then end with a >. When you have closing tags, closing tags include a / between the < and the tag name. For example, if I wanted to create a paragraph on a web page, I would use the following code.
/* This is the opening tag for my paragraph */
<p>
Hello World!
/* This is the closing tag for my paragraph. This is how I end a paragraph in code. */
</p>
The first two lessons introduce the paragraph and headline tags that developers regularly use when they build websites. To make a paragraph on a website, developers use a p tag to tell the computer the content is a paragraph. When developers want to make a headline, they use the h1 tag.
Developers can make a variety of different headlines depending on the tags they use. There are six different headline tags. The h1 tag lets the computer know which tag is the most important headline on the website while an h6 tells the computer that this headline is the sixth most important headline.
For example, here is how all the headline tags would look like on a browser.
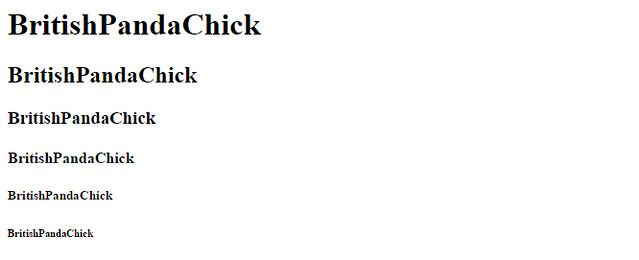
Now here is the code working behind the scenes. Can you see the difference between the different headlines?
<h1>BritishPandaChick</h1>
<h2>BritishPandaChick</h2>
<h3>BritishPandaChick</h3>
<h4>BritishPandaChick</h4>
<h5>BritishPandaChick</h5>
<h6>BritishPandaChick</h6>
There are lots of HTML tags to cover, but developers don’t need to memorize every tag. However, there are a few things developers need to remember when working with HTML tags. This will save you headaches later down the road when you begin coding.
More Text Tags!
The paragraph and headline tags aren't the only tags introduced in the first two lessons of Skillcrush 101. These two lessons dive further into text tags.
strong tag
First, there is the strong tag. This tag tells the computer to make text bold similar to how it is seen in Google Docs or Microsoft Word.
em tag
To make text italicized, developers use the em tag to emphasize specific parts of the tag. Both strong and em tags are used on websites to highlight or draw attention to parts of the text.
br tag
Next, there is the br tag. The br tag makes a line break in the code, so the content moves to another line on the website. I like to think the br tag is similar to pressing enter on a keyboard or making a page break in Microsoft Word.
Here is how a developer might put this code in a text editor.
<p>This is how I <strong>bold</strong> text.</p>
<p>This is how I <em>italicize</em> text.</p>
<p>I am creating a line <br> break in this text. Isn't programming amazing?</p>
Now if you run the code in the browser, this is how it would look. Unlike some of the other tags discussed in this post, you don’t need a closing tag for br tags. Just place the br tag anywhere in your text and the computer will break up the text into two different lines.

Conclusion
HTML is often the place where most developers get started and it is a good place for newbies to start on their coding journey. HTML is the language the computer uses, and developers have to start familiarizing themselves with how the computer interprets language before they begin writing code themselves. The first two lessons dive right into HTML by introducing some of the most important text tags used to create content on a website.
This might now seem like much, but that is enough to get you to start building a website. I talked about a few tags in this post. If you would like, you can download a text editor or find an online text editor to start trying out all the HTML tags I mentioned.
You can also keep learning about HTML through a variety of resources. Many of these resources are free and will go further into detail about HTML than I did. Tomorrow will be about lessons three and four in Skillcrush 101.
These lessons go over even more text tags. This post will review how developers make different lists. You will also learn how to add images to a website and how to create links on a website. You will even learn how to link images to different websites.
This post was originally published January 11, 2017 on the blog The Original BritishPandaChick. I made minor changes to the original post to work here on CodeNewbie.


Top comments (1)
Light Mode is generally recommended for users with certain visual impairments or conditions, as it provides better contrast google docs dark mode and readability. It ensures that text and other elements are more distinguishable, making it easier for users with visual challenges to navigate and interact with documents.