Now that you have all the requirements we need to be installed, let's set up the project.
If you're having any problems setting up or installing the dependencies, feel free to leave a comment or shoot me a DM.
What we'll be covering in this post.
- Creating a new project
- Adonis Project Structures
- IDE Setup
- Starting the Development Server
- Database Setup
Create a new project
To initialize a new project, all we need is a simple command on the terminal.
Simply navigate to the directory you'd like the project to be located and type the following;
npm init adonis-ts-app fitit or yarn create adonis-ts-app fitit
Let's break down this command for context.
-
npm init- this is simply initializing the project. Since we're using npm as the package manager, we usenpm. -
adonis-ts-app- we're initializing the project as a typescript project. If you wish not to use typescript and stick to vanilla JavaScript, you can use theadonis new fitit. This would involve installing the adonis cli. For more details on this, head over to this link. However, I recommend using the typescript version. -
fitit- this is the name of the application.
In general, the general structure of creating a new Adonis application is
npm init adonis-ts-app <project_name>
After you've typed the project initialization command, npm first installs the necessary adonis packages, which then prompts you to choose a preferred project structure.
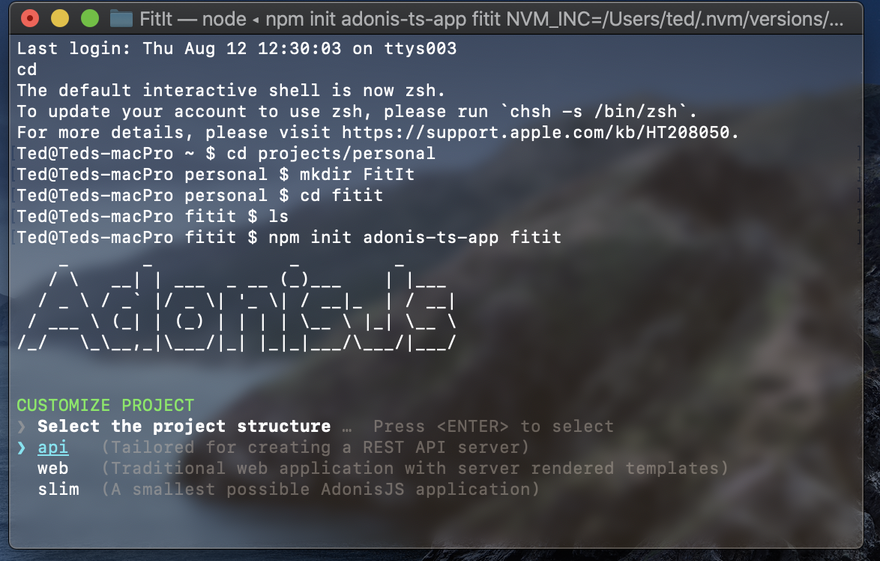
Adonis Project structures
You can choose between one of the following project structures.
-
web projectstructure is ideal for creating classic server-rendered applications. We configure the support for sessions and also install the AdonisJS template engine(edge). Also, the support for serving static files like images is provided. -
api projectstructure is ideal for creating an API server. This also configures the support for CORS. -
slim projectstructure creates the smallest possible AdonisJS application and does not install any additional packages, except the framework core. This sort of allows for flexibility. It's up to the developer to build the application ground-up.
It's worth noting that apart from some minor differences, the overall project structure is almost similar.
For this project, we'll be using the api project structure. The reason for this is that I'm mostly going to be using Adonis as an API server, which I'll then hook to a vue.js frontend.
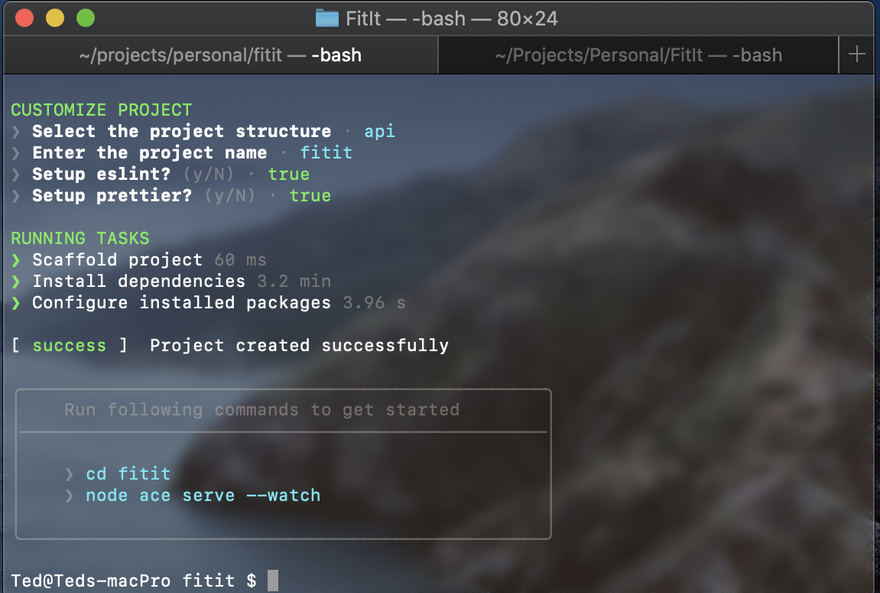
If you're using vs code, the command prompt will ask for additional configurations. These are prettier and eslint-related. I advise using both formatters.
After the project has been created, you'll get a message like this on the terminal.
Vs Code Setup
This section is intended for anyone using vs code as their IDE. If you use any other IDE, you can skip over to the next section.
Some extensions will make your adonis development easier in vs code. These are;
- Prettier and eslint - As I'd mentioned earlier you need to have prettier and eslint installed. This will be set up during the installation process.
- JavaScript and TypeScript Nightly
- Adonis JS Snippets - provides insightful snippets.
- Adonis Js Go to controller will come in handy when we start working with routes.
Starting the Development server
Navigate to the project directory and open it on your IDE now that the project has been created.
Run the following command to spin up your local development server
node ace serve --watch
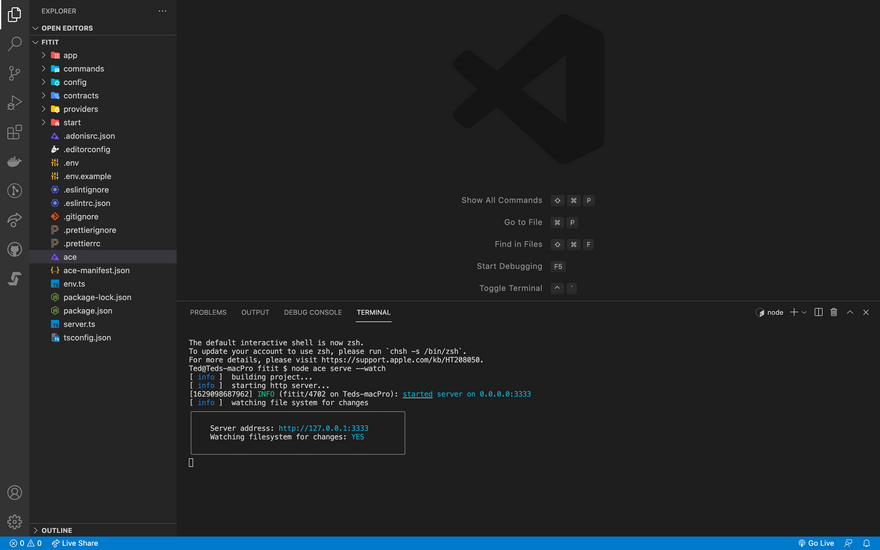
Open up your browser, and visit localhost:3333. If you did everything right, then you should see a screen with hello world text. Congratulations on setting up your first Adonis project! 🎉🎊
From here, things start to get interesting, we'll set up the database but before we head there, you might be wondering what node ace serve --watch is.
ace is a command-line framework that is embedded within your app. It allows you to create project-specific commands and run them using node ace. We'll be using ace commands throughout the tutorial, each with it's own purpose. For a more detailed explanation on ace commands, head over to this article by @amanvirk1
For the above command, let's break down what it does.
- The
servecommand starts the HTTP server and performs an in-memory compilation of TypeScript to JavaScript. - The
-watchflag is meant to watch the file system for changes and restart the server automatically(hot reload).
Database Setup
Before we wind up, let's connect our application to a database.
I'll assume that you have some knowledge of setting up Postgres or SQL databases and already have one on your computer. If this is not the case, you can use sqlite, which will be a file created on your machine once we start defining the database configuration.
AdonisJS has first class support for SQL databases. The data layer of the framework is powered by Lucid(AdonisJs ORM) and the package must be installed separately.
Simply run npm i @adonisjs/lucid
Upon successful installation, we'll configure our database driver and create a database. For this tutorial, I'll be using postgres. So my configs will be postgres-related. However, if you're using SQL, then use relevant configuration.
If you choose sqlite, no configuration will be required.
Once done, run
node ace configure @adonisjs/lucid
or
node ace invoke @adonisjs/lucid

The ace configure and invoke commands executes the instructions Javascript file exposed by the package.
Since I decided to go with postgres, I'll copy the code for validating the environment variables to the env.ts file.
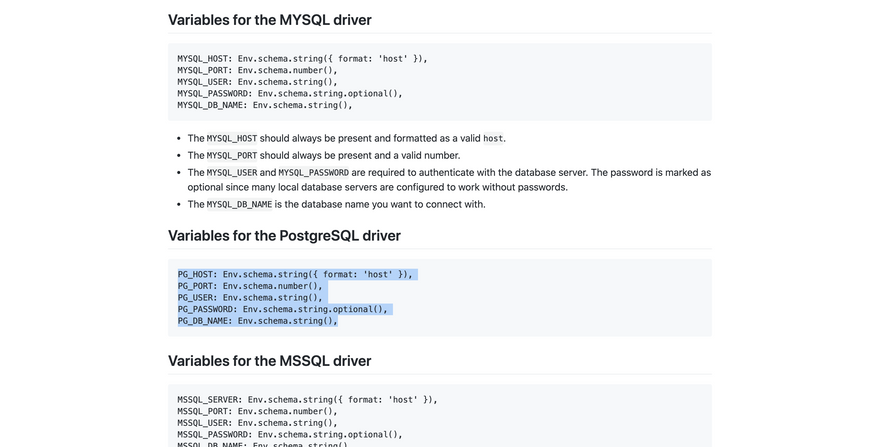
Environment variables are injected from outside. The env.ts file validates that they type match and that the app is always running with the correct set of configuration values.
Your env.ts file should now look like this.
import Env from '@ioc:Adonis/Core/Env'

export default Env.rules({
  HOST: Env.schema.string({ format: 'host' }),
  PORT: Env.schema.number(),
  APP_KEY: Env.schema.string(),
  APP_NAME: Env.schema.string(),
  PG_HOST: Env.schema.string({ format: 'host' }),
  PG_PORT: Env.schema.number(),
  PG_USER: Env.schema.string(),
  PG_PASSWORD: Env.schema.string.optional(),
  PG_DB_NAME: Env.schema.string(),
  NODE_ENV: Env.schema.enum(['development', 'production', 'testing'] as const),
})
- The
config/database.tsfile holds all the configuration related to the database. For more details on this, check out the documentation.
Next, we'll configure our database on postgres.
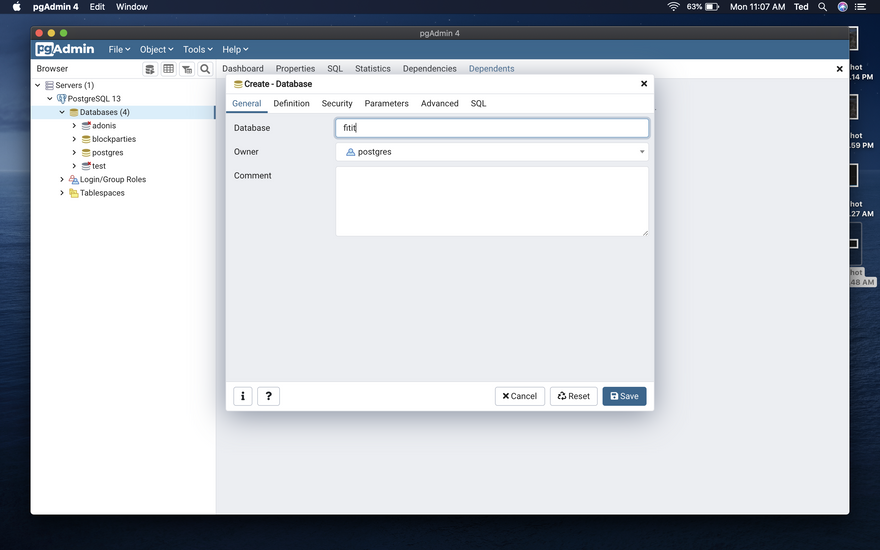
You can name your database whatever name you wish.
Finally, go to your .env file and modify these values
DB_CONNECTION=pg
PG_HOST=localhost
PG_PORT=5432
PG_USER=postgres
PG_PASSWORD=<your_postgres_password>
PG_DB_NAME=<your_db_name>
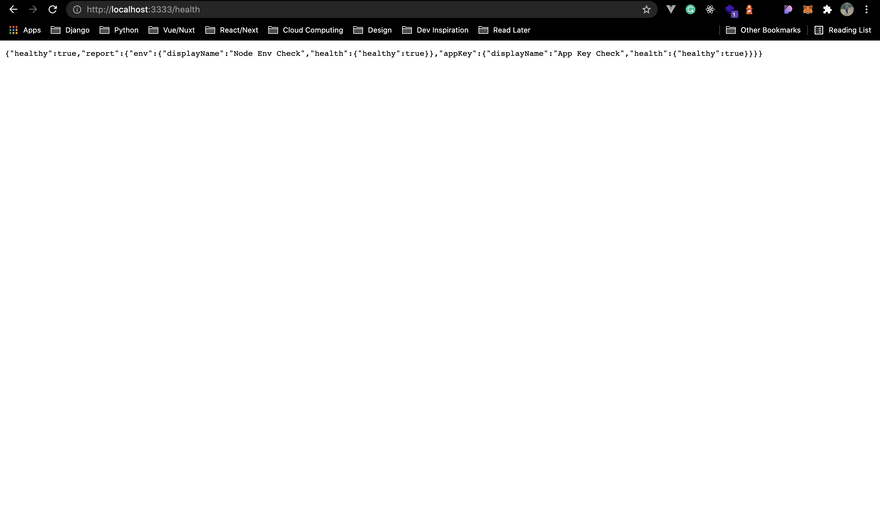
Testing Database connection.
Adonis comes with a neat health checker that checks if the database connection is working.
Navigate to start/routes.ts and paste the following code.
import HealthCheck from '@ioc:Adonis/Core/HealthCheck'
import Route from '@ioc:Adonis/Core/Route'

// check db connection
Route.get('health', async ({ response }) => {
  const report = await HealthCheck.getReport()

  return report.healthy ? response.ok(report) : response.badRequest(report)
})
With your server still running, open a browser tab and type localhost:3333/health
If everything worked fine and your database is connected, it should display the following screen.
Closing Thoughts
Thank you for following along, if you like the content and would like to know more about Adonis Development, bookmark this series, head over to my personal website or follow me on Twitter. You can also leave a comment in case you need any clarification or would like to point out an addition.
For the next piece, I'll be covering database models and relationships.
You can also follow the series on my personal website.
Stay tuned!


Top comments (0)