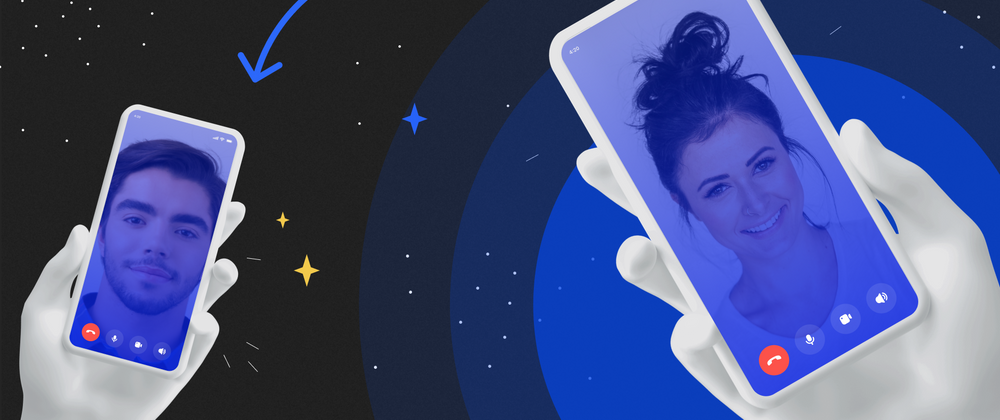
You’ve probably heard of WebRTC if you wanted to create an online conference app or introduce calls to your application. There’s not much info on that technology, and even those little pieces that exist are developer-oriented. So we aren’t going to dive into the tech part but rather try to understand what WebRTC is.
WebRTC in brief
WebRTC (Web Real Time Communications) is a protocol that allows audio and video transmission in realtime. It works with both UDP and TCP and can switch between them. One of the main advantages of this protocol is that it can connect users via a p2p connection, thus it transmits directly while avoiding servers. However, to use p2p successfully, one must understand p2p’s and WebRTC’s peculiarities.
You can read more in-depth information about WebRTC here.
Stun and Turn
Networks are usually designed with private IP addresses. These addresses are used within organizations for systems to be connected locally and they aren’t routed in the Internet. In order to allow a device with a private IP to contact devices and resources outside the local network, a private address must be translated to a publicly accessible address. NAT (Network Address Translation) takes care of the process. You can read more about NAT here. We just need to know that there's a NAT table in the router and that we need a special record in the NAT which allows packets to our client. To create an entry in the NAT table, the client must send something to a remote client. The problem is that neither of the clients knows their external addresses. To deal with this, STUN and TURN servers were invented. You can connect two clients without TURN and STUN, but it’s only possible if the clients are within the same network.
STUN is directly connected to the Internet server. It receives a packet with an external address of the client that sent it and sends it back. The client learns its external address and the port that’s needed for the router to understand which client has sent the packet. That’s because several clients can simultaneously contact the external network from the internal one. That’s how the entry we need ends up in the NAT table.
TURN is an upgraded STUN server. It can work like STUN, but it also has more functions. For example, you will need TURN when NAT doesn’t allow packets sent by a remote client. It happens because there are different types of NAT, and some of them not only remember an external IP, but also a STUN server port. They don’t allow packets received from servers other than STUN. Not only that, it’s also impossible to establish a p2p connection inside 3G networks. In those cases you also need a TURN server which becomes a relay, making clients think that they’re connected via p2p.
Signal server
We know now why we need STUN and TURN servers, but it’s not the only thing about WebRTC. WebRTC can’t send data about connections, which means that we can’t connect clients using only WebRTC. We need to set up a way to transfer the data about connections (what is the data and why it's needed, we'll see below). And for that, we need a signal server. You can use any means for data transfer, you only need the opponents to exchange data among themselves. For instance, Fora Soft usually uses WebSockets.
Video calls one-on-one
Although STUN, TURN, and signal servers have been discussed, it’s still unclear how to create a call. Let’s find out what steps we shall take to organize a video call.
Your iPhone can connect any device via WebRTC. It’s unnecessary for both clients to be related to iPhone, as you can also connect to Android devices or PCs.
We have two clients: a caller and one who’s being called. In order to make a call, a person has to: Receive their local media stream (a stream of video and audio data). Each stream can consist of several media channels. There can be a few media streams: from a camera and a desktop, for example. Media stream synchronizes media tracks, however, media streams can’t be synchronized between each other. Thus, sound and video from the camera will be synchronized with one another but not with the desktop video. Media channels inside the media track are synchronized, too. The code for the local media stream looks like this:
func startLocalStream() {
    let stream = streamsContainer.stream(forIdentifier: PublishStreamModel.publish)
    stream.startCameraCapturer(processDeviceRotations: false, prefferedFrameSize: CGSize(width: 640,height: 480), prefferedFrameRate: 15)
}
- Create an offer, as in suggesting a call start.
if self.positioningType == .caller {
    self.prepareAndSendOffer()
}
- Send their own SDP through the signal server. What is SDP? Devices have a multitude of parameters that need to be considered to establish a connection. For example, a set of codecs that work with the device. All these parameters are formed into an SDP object or a session descriptor that is later sent to an opponent via the signal server. It’s important to note that the local SDP is stored as text and can be edited before it’s sent to the signal server. It can be done to forcefully choose a codec. But it’s a rare occasion, and it doesn’t always work.
func stream(_ stream: StreamController?,
            shouldSendSessionDescriptionsessionDescriptionModel: StreamSessionDescriptionModel,
            identifier: String,
            completion: ((Bool)-> ())?) {
    shouldSendSessionDescription?(sessionDescriptionModel, identifier)
}
- Send their Ice Candidate through a signal server. What’s Ice Candidate? SDP helps establish a logical connection, but the clients can’t find one another physically. Ice Candidate objects possess information about where the client is located in the network. Ice Candidate helps clients find each other and start exchanging media streams. It’s important to notice that that the local SDP is single, while there are many Ice Candidate objects. That happens because the client’s location within the network can be determined by an internal IP-address, TURN server addresses, as well as an external router address, and there can be several of them. Therefore, in order to determine the client’s location within the network, you need a few Ice Candidate objects.
func stream(_ stream: StreamController?,
            shouldSendCandidate candidateModel: StreamCandidateModel,
            identifier: String,
            completion: ((Bool) -> ())?) {
    shouldSendCandidate?(candidateModel, identifier)
}
- Accept a remote media stream from the opponent and show it. With iOS, OpenGL or Metal can be used as tools for video stream rendering.
func stream(_ stream: StreamController?, shouldShowLocalVideoView videoView: View?, identifier id: String) {
    guard let video = videoView else { return }
    self.localVideo = video
    shouldShowRemoteStream?(video, id)
}
The opponent has to complete the same steps while you’re completing yours, except for the 2nd one. While you’re creating an offer, the opponent is proceeding with the answer, as in answers the call.
if self.positioningType == .callee && self.peerConnection?.localDescription == nil {
    self.prepareAndSendAnswer()
}
Actually, answer and offer are the same thing. The only difference is that while a person expecting a call sets up an answer means, while they generate their local SDP, they rely on the caller’s SDP object. To do that, they refer to the caller’s SDP object. Therefore, the clients know about both device parameters and can choose a more suitable codec.
To summarize: the clients first exchange SDPs (establish a logical connection), then Ice Candidates (establish a physical connection). Therefore, the clients connect successfully, they can see, hear, and talk with each other.
That’s not everything one needs to know when working with WebRTC in iOS. If we leave everything as it is at the moment, the app users will be able to talk. However, only if the application is open, will they be able to learn about an incoming call and answer it. The good thing is, this problem can be easily solved. iOS provides us with a VoIP push. It’s a kind of push notification in iOS, and it was created specifically for work with calls. This is how it’s registered:
// Link to the PushKit framework
import PushKit

// Trigger VoIP registration on launch
func application(application: UIApplication, didFinishLaunchingWithOptions launchOptions: NSDictionary?) -> Bool {
    self.voipRegistration()
    return true
}

// Register for VoIP notifications
func voipRegistration() {
    let mainQueue = dispatch_get_main_queue()
    // Create a push registry object
    let voipRegistry: PKPushRegistry = PKPushRegistry(mainQueue)
    // Set the registry's delegate to self
    voipRegistry.delegate = self
    // Set the push type to VoIP
    voipRegistry.desiredPushTypes = [PKPushTypeVoIP]
}
This push notification helps show an incoming call screen which allows the user to accept or decline the call. It’s done via this function:
func reportNewIncomingCall(with UUID: UUID,
                           update: CXCallUpdate,
                           completion: @escaping (Error?) -> Void)
It doesn’t matter what the user is doing at the moment. They can be playing a game or having their phone screen blocked. VoIP push has the highest priority, which means that notifications will always be arriving, and the users will be able to easily call one another. VoIP push notifications have to be integrated along with call integration. It’s very difficult to use calls without VoIP because for a call to happen, the users will have to have their apps open and just sit and wait for the call. That can be classified as strange behavior. The users don’t want to act strange, so they’ll probably choose another application.
Conclusion
We’ve discussed some of the WebRTC peculiarities; found out what’s needed for two clients to connect; learned what steps the clients need to take for a call to happen; what to do besides WebRTC integration to allow iOS users to call one another. We hope that WebRTC isn’t a scary and unknown concept for you anymore, and you understand what you need to apply it to your product.


Top comments (0)