
Have you ever wanted to add a map to your application to make it look nice? You might have wanted to build an entire application dedicated to using a map or add it to your contact page.
In the article, we will look at a few steps to help you get started with adding a map to your website or web application using Mapbox. At the end of the article, you should know how to prepare an HTML page that shows a map using the Mapbox API.
Table of Contents
- Get your HTML file ready
- Create a Mapbox account
- Get the Mapbox map code to integrate to your application
- The result of the HTML file after adding the code
- Preview
- Further reading
Get your HTML file ready
We want our map to render somewhere on the website. So, we need to have a file with an .html extension. For this article, we will use index.html.
Treat this how-to article as a project. Place your files into a folder dedicated to learning how to add the map, for example, ./documents/Map-with-Mapbox/index.html.
index.html
<!DOCTYPE html>
<html lang="en">
<head>
    <meta charset="UTF-8">
    <meta http-equiv="X-UA-Compatible" content="IE=edge">
    <meta name="viewport" content="width=device-width, initial-scale=1.0">
    <title>Adding a map to your website or web application using Mapbox</title>

    <!-- Styles -->

</head>
<body>
    <!-- Header -->
    <header>
        <h1 style="text-align: center;">Map with Mapbox</h1>
    </header>

    <!-- Main -->
    <main>
        <!-- Add your div tag -->
    </main>

    <!-- Scripts -->

</body>
</html>
Create a Mapbox account
What is Mapbox?
Mapbox is a provider. A provider for online location data to integrate into your websites or applications. Their APIs allow you to gain access to their tools and services using programmatic skills.
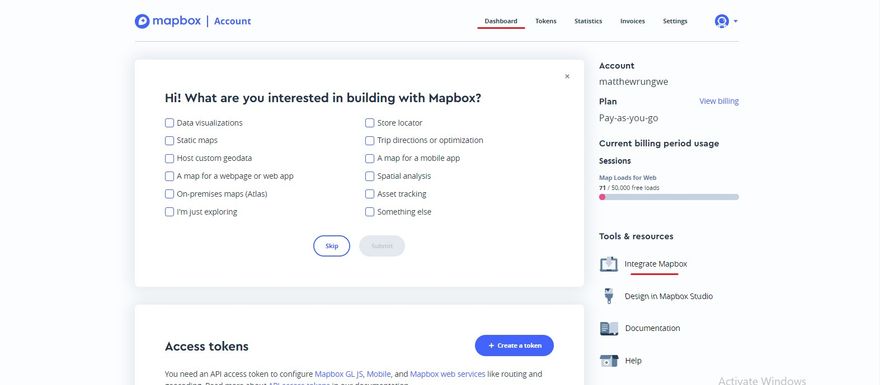
To create an account, go to mapbox.com. Create an account for yourself and sign in. In your Dashboard, you will have the information you need to get started with integrating a map into your website.
Get the Mapbox code to add to your application
- Go to the Integrate Mapbox link in the Dashboard.
- Choose the JS Web SDK link.
- Use the Mapbox CDN link.
- Copy the styles
linkbelow into thehead:
<link href='https://api.mapbox.com/mapbox-gl-js/v2.3.1/mapbox-gl.css' rel='stylesheet' />
- Copy the
scripttag below towards the bottom of thebody:
<script src='https://api.mapbox.com/mapbox-gl-js/v2.3.1/mapbox-gl.js'></script>
- Press the Next > button to get the
scriptthat accesses the Mapbox API and allocates a container:
<script>
    mapboxgl.accessToken = 'Add your Access Token Here';
    var map = new mapboxgl.Map({
        container: 'map',
        style: 'mapbox://styles/mapbox/streets-v11'
    });
</script>
- Add a
divtag into thebodywith anidthat matches the container in thescriptabove:
<div id='map' style='width: 400px; height: 300px;'></div>
The result of the HTML file after adding the code
I have included a sample of the result of the HTML file after I have added the code from the Mapbox CDN.
index.html
<!DOCTYPE html>
<html lang="en">
<head>
    <meta charset="UTF-8">
    <meta http-equiv="X-UA-Compatible" content="IE=edge">
    <meta name="viewport" content="width=device-width, initial-scale=1.0">
    <title>Adding a map to yor website or web application using Mapbox</title>

    <!-- Styles -->
    <link href='https://api.mapbox.com/mapbox-gl-js/v2.3.1/mapbox-gl.css' rel='stylesheet' />
</head>
<body>
    <!-- Header -->
    <header>
        <h1 style="text-align: center;">Map with Mapbox</h1>
    </header>

    <!-- Main -->
    <main>
        <div id='map' style='width: 400px; height: 300px; margin: 0 auto;'></div>
    </main>

    <!-- Scripts -->
    <script src='https://api.mapbox.com/mapbox-gl-js/v2.3.1/mapbox-gl.js'></script>

    <script>
        mapboxgl.accessToken = 'Add your Access Token Here';
        var map = new mapboxgl.Map({
            container: 'map',
            style: 'mapbox://styles/mapbox/streets-v11',
            center: [28.112268, -26.270760], // [Longitude, Latitude]
            zoom: 5 // Initial zoom
        });
    </script>
</body>
</html>
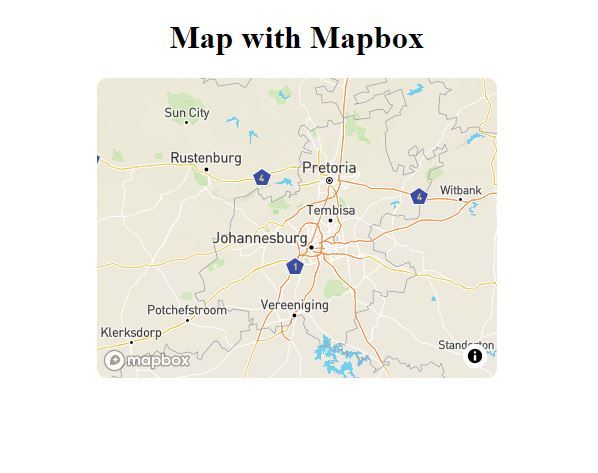
Preview
After you have saved and rendered your HTML file, the map will display on your web page. The image added below is a preview of how the code above displays in the browser.
chrome
Further reading
To get more from Mapbox, read the:
- Documentation,
- Tutorials, and
- Blog
The information can help you to grow your map into something more robust and preformat.
This article was supposed to serve as an introduction to Mapbox and how you can integrate it into your website.
Thank you for taking the time to read. Please, share your thoughts about the article in the comments. You can also let me know of any additions or changes I can make to this article.


Latest comments (3)
Great tutorial! I followed the steps and successfully integrated a Mapbox map into my germanic.ae site. The instructions were clear and easy to follow. Thanks for sharing!
I used to use the old Dreamweaver software to add maps, but thanks for teaching this for JS!
It’s a pleasure. I just thought it would be nice to share. I am happy you like it.
Thank you 🙏.