Before you dive into deploying SafeLine WAF, there are a few essential prerequisites to ensure your setup goes smoothly. This guide walks you through preparing a homelab environment using Ubuntu Server and Kali Linux, along with the Damn Vulnerable Web Application (DVWA) for testing.
Step 2: Prerequisites
2.1 Clone DVWA from Git
cd /var/www/html
sudo git clone https://github.com/digininja/DVWA.git
If git is not installed:
sudo apt-get install -y git
2.2 Set File Permissions
sudo chown -R www-data:www-data DVWA
sudo chmod -R 755 DVWA
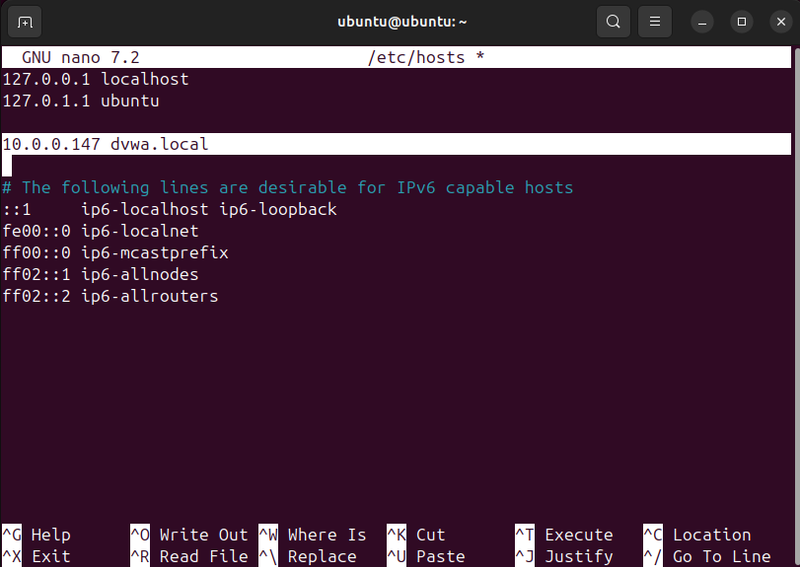
2.3 DNS Resolution Setup
Edit /etc/hosts on both Kali and Ubuntu:
sudo nano /etc/hosts
Add the following line:
10.0.0.147 dvwa.local
This allows access to DVWA at:
http://dvwa.local:8080/DVWA/
2.4 Ubuntu Configurations
Install OpenSSL
sudo apt-get install -y openssl
Install and Configure LAMP Stack
sudo apt-get install -y apache2 php php-mysql mysql-server
sudo mysql_secure_installation
# Set MySQL root password: ubuntu (testing purposes)
Update DVWA Config File
Edit DVWA/config/config.inc.php:
$DBMS = 'MySQL';
$db   = 'dvwa';
$user = 'dvwa_user';
$pass = 'p@ssw0rd';
$host = 'localhost';
Create DVWA Database and User
sudo mysql -u root -p
Inside MySQL shell:
CREATE DATABASE dvwa;
CREATE USER 'dvwa_user'@'localhost' IDENTIFIED BY 'p@ssw0rd';
GRANT ALL ON dvwa.* TO 'dvwa_user'@'localhost';
FLUSH PRIVILEGES;
exit;
Initialize DVWA
Visit:
http://dvwa.local/setup.php
Click Create/Reset Database.
2.5 Change DVWA Listening Port to 8080
sudo nano /etc/apache2/ports.conf
Change:
Listen 80
to:
Listen 8080
2.6 Change Apache Virtual Host Port
sudo nano /etc/apache2/sites-available/000-default.conf
Update:
<VirtualHost *:8080>
    ...
</VirtualHost>
Restart Apache:
sudo systemctl restart apache2
✅ Next Step: With your environment ready, we can move on to installing and configuring SafeLine WAF to protect DVWA.
Join the SafeLine Community
If you continue to experience issues, feel free to contact SafeLine support for further assistance.


Top comments (1)
Total Power provides high-quality and affordable rental generators in Dubai for homes, businesses, and construction sites. Whether you need a small generator rental companies for personal use or a portable power generator rental for events, we have the right solution. Our diesel generators are fuel-efficient and reliable, ensuring uninterrupted power. We offer flexible rental plans at competitive diesel generator rental costs to suit your needs. Trust Total Power for safe and efficient generator rental Dubai services. Contact us today to get the best power solution!