In this two-part series, I’ll walk you through how I built a dual-layered web security setup using two open-source tools: ModSecurity and SafeLine WAF. The goal is to combine their strengths for enhanced protection and better observability.
Why Use Both ModSecurity and SafeLine?
ModSecurity is a powerful and widely-used open-source WAF engine, especially known for its flexible rule sets and deep integration with Nginx and Apache. However, it lacks a graphical interface, which can make configuration and monitoring more difficult.
SafeLine WAF, on the other hand, is a user-friendly open-source firewall developed by Chaitin Technology. It comes with a clean web console and provides out-of-the-box protection against common web threats like SQLi, XSS, and CSRF. It’s ideal for those who want to get started quickly or need visual feedback.
By combining the two, we can:
- Use SafeLine as the first layer of defense on port 80
- Route traffic to ModSecurity behind Nginx on port 8080 for deeper inspection
- Optionally hide port 8080 and force all access through SafeLine
This setup allows for traffic analysis at both the edge and origin levels. It’s also a great learning environment since both tools are open-source and free to use.
Part 1: Installing Dependencies and Preparing the Environment
We’ll start by preparing the server to run SafeLine and ModSecurity side by side. For this demo, I’m using CentOS 7.
System Requirements for SafeLine WAF
- OS: Linux
- Architecture: x86_64 with SSSE3 support
- Docker: v20.10.14+
- Docker Compose: v2.0.0+
- Minimum specs: 1-core CPU / 1 GB RAM / 5 GB disk
Step 1: Check CPU Support
uname -m                    # Check architecture
cat /proc/cpuinfo | grep processor
lscpu | grep ssse3          # Verify SSSE3 support
Installing Docker on CentOS 7
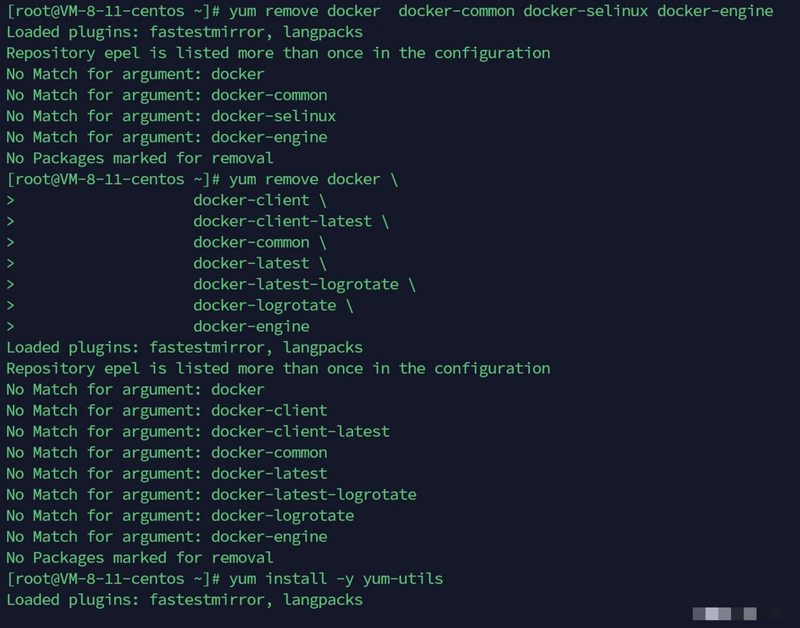
2.1 Remove any existing Docker (optional)
yum remove docker \
            docker-client \
            docker-client-latest \
            docker-common \
            docker-latest \
            docker-latest-logrotate \
            docker-logrotate \
            docker-engine
If Docker was not previously installed, you'll get a "not found" message, which is normal.
2.2 Install yum-utils and set up the repo
yum install -y yum-utils
yum-config-manager --add-repo http://mirrors.aliyun.com/docker-ce/linux/centos/docker-ce.repo
sed -i 's/download.docker.com/mirrors.aliyun.com\/docker-ce/g' /etc/yum.repos.d/docker-ce.repo
2.3 Install Docker
yum install docker-ce docker-ce-cli containerd.io
2.4 Check Docker version
systemctl start docker
docker version
At this point, Docker is installed on CentOS.
Installing Docker Compose
3.1 Remove any old version
rm /usr/local/bin/docker-compose
Simply delete the old directory. If it was never installed, you can ignore this step. If unsure, running the command will show if the directory exists.
3.2 Download the latest version
curl -L https://github.com/docker/compose/releases/download/v2.17.2/docker-compose-`uname -s`-`uname -m` -o /usr/local/bin/docker-compose
If the download is slow, you can download it on Windows and use FTP to upload it to the bin directory.
3.3 Add executable permissions
chmod +x /usr/local/bin/docker-compose
At this point, you should have installed the environment dependencies required for SafeLine WAF.
Part 2: Reconfiguring Nginx and Installing SafeLine WAF
In this setup, the WAF is deployed on the local server, sharing the same machine as the backend server. However, it is not recommended to configure it this way in a production environment, as it increases the load on a single machine, making it prone to crashes and difficult to troubleshoot. In production, it is recommended to deploy SafeLine on a separate server.
Step 1: Change Nginx Port to 8080
SafeLine will take over port 80, so we need to move Nginx (with ModSecurity) to port 8080:
Set environment variables
vim /etc/profile
export NGINX_HOME=/usr/local/nginx
export PATH=$PATH:$NGINX_HOME/sbin
source /etc/profile
This ensures that the Nginx home directory and executable file directory are correctly configured.
Stop current Nginx instance
nginx -s stop
netstat -ntlp  # Check port status
You should see that port 80 is no longer being monitored.
Change listen 80; to listen 8080;
vim /usr/local/nginx/conf/nginx.conf
Restart Nginx
nginx -s reload
netstat -ntlp  # Check the port status
After restarting, Nginx should now be listening on port 8080. If a firewall is in place, make sure to open port 8080 (error solutions are provided at the end of this article).
Step 2: Install SafeLine WAF
Run the following script to install SafeLine WAF:
bash -c "$(curl -fsSLk https://waf.chaitin.com/release/latest/setup.sh)-- --en"
By default, SafeLine uses port 9443 for the admin console. Make sure your firewall allows access to this port.
Step 3: Initialize and Login
Reset the default admin account:
docker exec safeline-mgt resetadmin
You’ll get a default username and password to log into the console via https://your_ip:9443.
Step 4: Configure Protection Rules
In the SafeLine console, add a new protected site. Point the upstream to 127.0.0.1:8080, and make SafeLine listen on port 80.
Traffic will now flow like this:
Client → SafeLine (port 80) → Nginx + ModSecurity (port 8080)
Use SafeLine’s access logs and Nginx logs to verify the forwarding works.
Step 5: Basic Attack Simulations
Try accessing URLs with common attack payloads to see how SafeLine responds:
- SQL Injection:
/?id=1+AND+1=2+UNION+SELECT+1 - XSS:
/?id=<img src=x onerror=alert(1)> - Path Traversal:
/?id=../../../../etc/passwd - Code Injection:
/?id=phpinfo();system('id') - XXE:
/?id=<?xml version="1.0"?><!DOCTYPE foo SYSTEM "">
SafeLine should log and block these attempts if configured properly.
In Part 2, we’ll benchmark the performance, explore advanced rule tuning, and test different payload sets across both WAFs.
Join the SafeLine Community
Want to try a powerful, open source WAF?


Top comments (1)
Great explanation! Combining tools like ModSecurity and SafeLine WAF must really boost protection. Meanwhile, when I need a break from tech stuff, I relax with Italian Brainrot Clicker, a fun way to clear my mind!